...

Tag: digital organization

  • How to Build a Note Taking System That Actually Works

    How to Build a Note Taking System That Actually Works

    A good note taking system isn’t a fancy app or a neat stack of notebooks. It’s a reliable process for catching, connecting, and using what you know. It turns that chaotic junk drawer of ideas, links, and meeting notes into a personal knowledge base that actually helps you think.

    The goal is to stop being a passive collector of information and become an active builder of knowledge. This shift is what separates a digital dumping ground from a second brain. To get a handle on just how taxing this overload can be, you can find a solid path in our book, The Power of Clarity.

    Affiliate Disclosure: Please note that this article contains affiliate links. If you make a purchase through these links, we may earn a small commission at no extra cost to you. This helps support our work in creating valuable content.

    Why Your Current Note Taking System Feels Chaotic

    If your current “system” is a mix of cryptic sticky notes, a dozen different apps, and a desktop littered with untitled documents, you’re not alone. So many of us start with good intentions. Yet we end up with a tangled mess of information that creates more stress than it solves. This isn’t a personal failure. It’s the predictable result of facing an avalanche of information without a structure to handle it.

    From a neuroscience perspective, every disconnected note is an “open loop” in your brain. Your mind registers them as unfinished business. This quietly drains your mental energy and splinters your focus. Research in psychology shows that these incomplete tasks, known as the Zeigarnik effect, create a constant, low-grade cognitive strain. This makes it harder to concentrate on the work that actually matters.

    The Real-World Cost of a Disorganized Note Taking System

    This happens all the time. Imagine a project manager, let’s call her Sarah, on an urgent client call. The client asks about a key decision made two months back. Sarah knows she wrote it down. But where? She’s frantically clicking through her notes app, scanning random documents, and searching her email. She might even wish she had a simple habit tracker journal just to log her daily notes. That awkward silence on the line kills her credibility. It also floods her with stress. The detail is buried, lost in a sea of digital clutter.

    This is the exact moment a collection of notes becomes a source of anxiety instead of a tool for confidence. The goal is to build a reliable note taking system that serves you.

    A productive desk setup with a laptop, smartphone, sticky notes, and a pen, with the phone displaying a note-taking app that highlights a practical note taking system.

    From Mental Clutter to Mental Clarity

    That feeling of frustration is a clear signal. Your current method isn’t working with your brain; it’s working against it. Instead of letting your ideas scatter, the first step is to commit to a single, trusted hub for your thoughts. This doesn’t mean you need a complicated, feature-packed system. Consistency is what matters. A simple, reliable process you stick with will always beat a powerful tool you never open. Getting to this point is about building simple, sustainable habits. If you feel swamped, a structured approach like the one in Focus Recharged is the only way out.

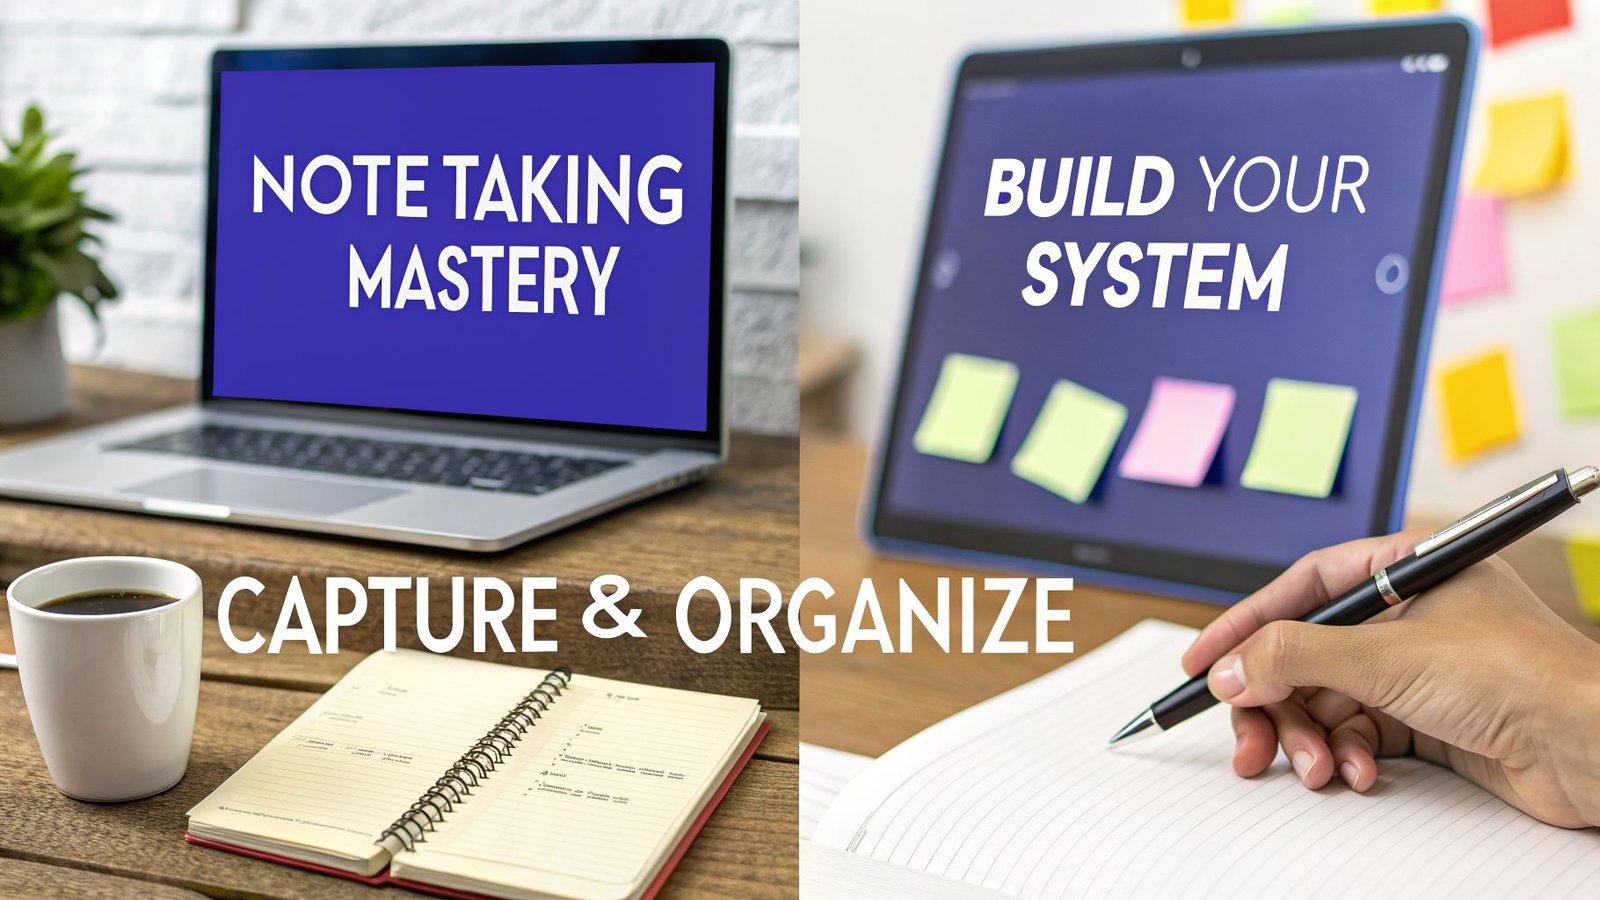
    The Four Pillars of a Powerful Note Taking System

    A truly powerful note taking system isn’t about finding the perfect tool. It’s about building a reliable process that turns fleeting ideas into something you can actually use. A good system should support your thinking, not add to the mental clutter. I’ve found it helps to break this process down into four distinct stages: Capture, Organize, Distill, and Express. Think of it as the CODE framework for knowledge work.

    Flat lay of a desk showing a CODE Framework note taking system with the steps Capture, Organize, Distill, and Express.

    Each stage tackles a crucial part of the journey, from a raw thought to a finished idea.

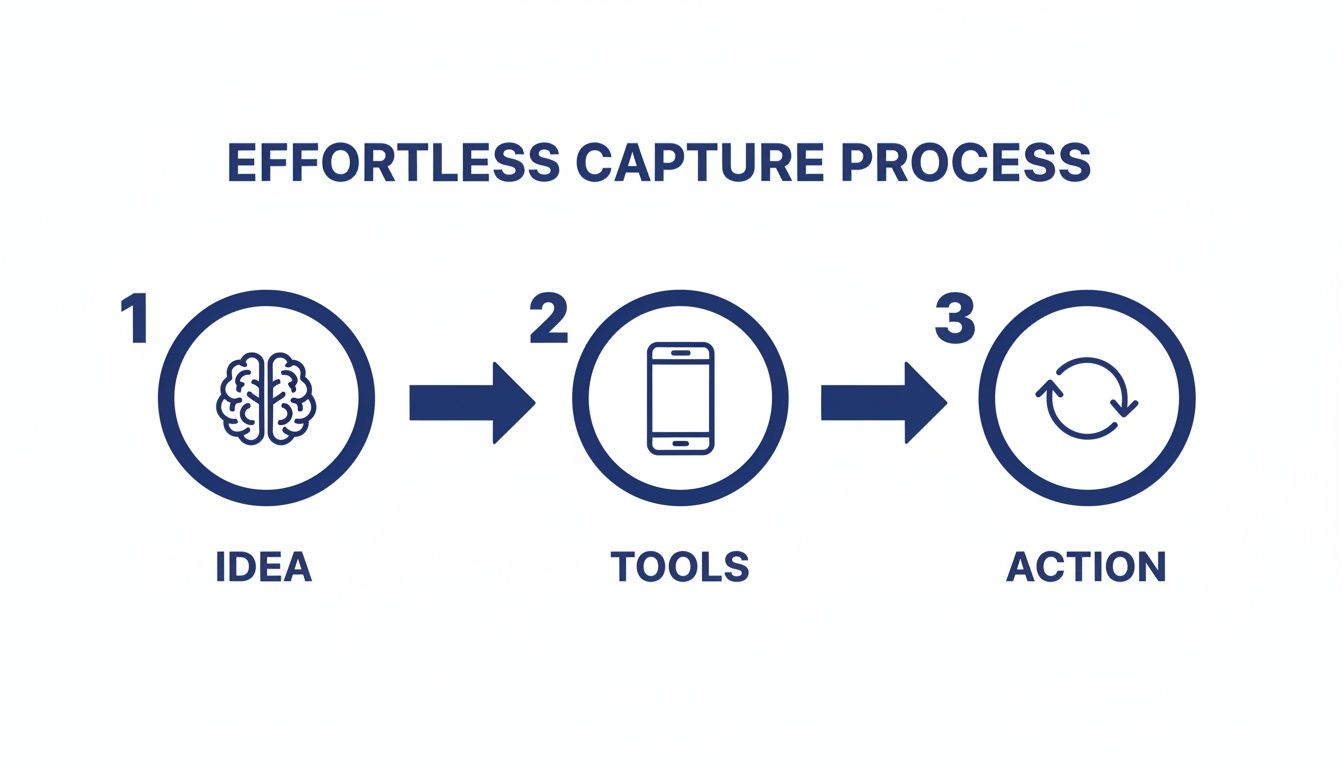
    Capture: Frictionless Idea Collection in Your System

    First, you need a way to get ideas out of your head and into your system with almost zero effort. Your brain is brilliant at having ideas but terrible at holding them. Every thought you try to “remember for later” creates an open loop that quietly drains your focus. This is the Zeigarnik effect in action—our minds fixate on incomplete tasks. A great capture habit is your secret weapon for closing those loops on demand.

    Real-World Scenario: A freelance writer is walking her dog when a brilliant article idea strikes. Instead of mentally rehearsing it, she pulls out her phone, opens a notes app, and dictates the core concept. The thought is now safely in her inbox, and her mind is free again. That’s a note taking system doing its job.

    The key is to have a capture tool that’s always with you. It could be a simple phone app, a pocket notebook, or a voice recorder. The specific tool matters less than its instant availability.

    Organize: Your Personal Library within the Note Taking System

    Once you’ve captured a note, it needs a home. This is where most people get bogged down, creating complex webs of tags and folders that quickly become overwhelming. Instead of building a filing cabinet, think of your note taking system as a personal library. The goal isn’t just archival; it’s about connection and action.

    Start with a few broad categories that make sense for your life. A simple, effective structure might include:

    • Projects: These are tasks with a clear deadline and outcome (e.g., “Launch New Website,” “Plan Q3 Marketing Campaign”).
    • Areas: These are your ongoing responsibilities that don’t have an end date (e.g., “Health & Fitness,” “Personal Finances,” “Professional Development”).
    • Resources: This is your reference library of articles, book notes, and materials on topics that interest you.
    • Archive: This is where you move completed projects and old notes. They’re out of sight but still searchable.

    This approach keeps your active workspace clean. It makes it easy to find what you need. It’s a key step in learning how to build a better system.

    Distill: Find the Core Insight of Your Notes

    This is where the real learning begins. Distilling is the act of reviewing your notes, pulling out the most important ideas, and rewriting them in your own words. It’s far more powerful than just highlighting or rereading. This process forces you to use active recall. Neuroscience shows that struggling to retrieve information from your memory is what makes that memory stronger. The harder you have to work to pull an idea out, the more deeply it gets wired into your brain.

    Real-World Scenario: A college student gets back from a lecture with pages of messy notes. Instead of just rereading them, she opens a fresh page. She writes a single paragraph summarizing the lecture’s main argument. That simple act of distillation solidifies her understanding. It also creates a potent study guide for later. Using a good monitor light bar for late-night study sessions can also reduce eye strain.

    When you pair this with spaced repetition—reviewing your distilled notes at increasing intervals—you’re using a scientifically proven method to lock in knowledge for the long term.

    Express: Turn Your Knowledge into Action

    Finally, your notes aren’t just for collecting; they’re for creating. The Express stage is about turning what you’ve learned into something tangible. This is the ultimate purpose of any note taking system.

    Putting your knowledge to work could mean anything from:

    • Writing an article based on your collected insights.
    • Building a presentation for a team meeting.
    • Starting a new personal project.
    • Simply sharing what you’ve learned with a friend or colleague.

    When you regularly use your notes to produce something, you create a powerful feedback loop. It gives your system a clear purpose. It transforms you from a passive consumer of information into an active creator of value. Your notes become an indispensable partner in everything you do.

    How to Choose the Right Tools for Your Note Taking System

    Choosing the right tools for your note taking system can feel surprisingly high-stakes. With a seemingly endless parade of sleek apps and beautiful notebooks, it’s easy to get stuck in analysis paralysis. But the secret isn’t finding the one “best” app. It’s about finding tools that disappear into your workflow. They should match how your brain actually works.

    The real question isn’t, “Which app is the most popular?” Instead, ask, “Which tool supports how I naturally think and organize?” A tool that feels liberating for a visual artist might be a cage for a software developer. Your goal is to match the tool to your personal need for structure, flexibility, or pure simplicity.

    Best Option for Beginners: Method First, Then Tools

    Before you download another piece of software, think about the method you want your tools to support. Different systems are built for different goals. When your tool aligns with your method, the whole system just clicks into place. Without that alignment, you’re just creating friction.

    • Zettelkasten: This is fantastic for academics, writers, and anyone whose goal is to connect ideas over the long haul. It’s a “bottom-up” approach where you link small, individual notes to build a sprawling web of knowledge over time.
    • P.A.R.A. (Projects, Areas, Resources, Archives): This is perfect if you’re action-oriented and need to organize information around concrete goals and responsibilities. It’s a “top-down” system that gives you immediate, practical structure.
    • Bullet Journaling (BuJo): This is for anyone who craves a flexible, screen-free analog system to track tasks, events, and notes all in one place. It’s a highly personalizable way to combine planning, doing, and reflecting.

    Your primary goal will point you to the right method.

    How to Choose Your Note Taking Method: A Comparison

    This quick comparison helps you see which approach fits your personal and professional life. Compare options to see what feels most natural.

    MethodBest ForCore PrinciplePotential Downside
    ZettelkastenAcademics, researchers, and writers building a long-term “second brain.”Linking atomic, single-idea notes to discover novel connections.Can feel abstract and slow to show value initially; requires discipline.
    P.A.R.A.Project managers, freelancers, and professionals managing multiple active commitments.Organizing information by its actionability and relevance to your current goals.Can become rigid if not maintained; requires regular reviews.
    Bullet JournalVisual thinkers, creatives, and anyone seeking a mindful, screen-free planning method.Rapid logging of tasks, events, and notes using a simple, flexible syntax.Limited searchability and can be time-consuming to set up and maintain.

    Once you have a sense of which philosophy fits, then you can go looking for tools.

    Best Note Taking System for Busy Professionals: Digital vs. Analog

    With a method in mind, the tool choice becomes much easier. Digital apps like Obsidian or Roam Research are brilliant for the Zettelkasten method. For P.A.R.A., structured apps like Notion, Evernote, or Microsoft OneNote are a natural fit. And for Bullet Journaling, a good notebook and a pen you love are all you need. A dedicated time blocking planner can be a fantastic analog partner to a digital system.

    Many people land on a hybrid approach that works beautifully. They might use a digital app as a long-term resource library. Simultaneously, they use a physical notebook for daily planning. The key is to be intentional about what goes where so you’re not creating more chaos.

    The Rise of AI and Collaborative Tools

    The world of note-taking is evolving fast. AI integration is a huge driver of this growth. Features like smart summarization and semantic search are becoming standard. They help us make sense of information overload. AI can digest long articles into key takeaways, saving you massive time. Our book, Marketing Magic: ChatGPT & AI Marketing, dives deep into these tools.

    For teams, collaborative tools make group note-taking smoother. Many platforms also weave in task management features, blurring the lines between notes and to-do lists.

    Building your own note taking system is like laying the foundation for a house you’ll improve for years. The first step is to create a single entry point. Think of it as a digital foyer. Every new thought, meeting note, or random idea goes into this “inbox” first. This simple rule eliminates friction. Your only job is to get it out of your head and into the system.

    Defining Your Core Structure for Your Note Taking System

    With a central inbox, the next step is a simple organizational spine. The biggest mistake is over-engineering with dozens of nested folders. A complicated system is one you won’t use when you’re tired or busy.

    Start with just a few top-level categories:

    • Projects: For anything with a defined goal and a finish line.
    • Areas: For your ongoing roles and responsibilities.
    • Resources: Your personal library for articles and book summaries.
    • Archive: A place for completed or irrelevant items.

    This framework keeps your active workspace clean and focused. It’s a modern spin on principles used for centuries. Our digital tools just make it much easier.

    The Power of Templates and Automation

    To make your system truly work for you, automate the small stuff. Templates are a game-changer here. They dramatically reduce decision fatigue. Behavioral science shows that good templates automate setup, freeing your cognitive bandwidth for the actual content.

    Start with templates for common notes:

    • Meeting Notes: Date, attendees, agenda, key takeaways, action items.
    • Project Plans: Goals, timelines, stakeholders, success metrics.
    • Book Summaries: Main argument, key quotes, your reflections.

    As your system grows, understanding concepts like workflow automation will help you cut out more manual work.

    A Freelancer’s Migration: A Real-World Example

    Let’s make this tangible. A freelance designer, Alex, had notes scattered across Google Docs, a paper notebook, and a notes app. Here’s the simple plan we used:

    1. Chose a Hub: Alex picked a single digital app to become the new central note taking system.
    2. Created the Structure: We set up four primary folders: Projects, Clients (Area), Inspiration (Resource), and Archive.
    3. Migrated Actively: Alex only moved notes for active projects and key client info. Old notes were left behind. This “just-in-time” migration prevents overwhelm.
    4. Established a Habit: Alex blocked out 15 minutes every Friday afternoon to process the inbox and file new notes.

    This step-by-step approach made the new system immediately useful.

    Creating Your Review Habit

    A note taking system is only as good as your habit of reviewing it. Without regular maintenance, it will become a digital junk drawer. Schedule short, consistent review sessions. A pomodoro timer can help you stay focused during these sessions, making the habit easier to stick with. This whole process is about refining your own process, not finding a magic app.

    A visual three-step process flow for choosing note tools, covering comparison, selection, and implementation.

    The flow from comparing options to implementing them shows that building your system is a journey, not a single event. It’s about making conscious choices that fit how you think and work.

    Editor’s Take: What Really Works for a Note Taking System

    After years of chasing the perfect productivity setup, here’s the most honest thing I can tell you. The best note taking system is the one that actually sticks. All the complex tagging, backlinking, and beautiful templates are worthless if the friction is too high to use them every day. My advice? Forget building a flawless digital brain overnight. Just start with one reliable digital app and one simple notebook.

    Who Is This Stripped-Down Approach For?

    This hybrid method is a lifesaver for knowledge workers, students, and creatives drowning in information. If your goal is to turn ideas into action—not just hoard them—this is for you. The biggest trap is “productivity procrastination.” This is when you spend more time tweaking your system than actually thinking. A good system should get out of your way, not become a new full-time job.

    The real magic happens when you focus on the Distill and Express pillars. This is where you transform raw notes into valuable insights. It’s the entire point of having a note taking system. Our guide on note taking from books is a great place to start mastering that skill. See the book that fits your goal to start applying these principles today.

    This simple hybrid approach lets you build momentum from day one. You can always add complexity later when a specific need arises. A simple system you use daily will always beat a perfect one you abandon after a week.

    Key Takeaways: Building Your Note Taking System

    Here’s a look back at the core ideas for building a note taking system that moves you from scattered information to structured clarity.

    One Hub to Rule Them All

    The most critical first step is deciding on a single, central place for everything. Whether it’s a specific app or a simple notebook, one inbox stops the mental energy drain from scattered notes. This is about making capture as frictionless as possible.

    Your System Needs a Job to Do

    A powerful note taking system is a dynamic process for thinking. The CODE framework gives your notes a purpose beyond storage.

    • Capture: Get thoughts out of your head quickly to close mental loops.
    • Organize: Use a simple, action-focused structure like P.A.R.A.
    • Distill: Rewrite notes in your own words to force understanding.
    • Express: Turn what you’ve learned into something new.

    Method First, Tool Second

    It’s incredibly easy to get lost searching for the “perfect” app. First, figure out how you want to work. Do you need to connect ideas like with Zettelkasten, or manage active projects with a system like PARA? Once you know your method, you can find a tool that supports it.

    A Garden Needs Weeding

    Your system is a living thing. If you don’t tend to it, it will become overgrown and useless. Set aside a short, recurring block of time each week to review, organize, and process your notes. This simple habit is what keeps the system trustworthy and powerful.

    FAQ: Your Note Taking System Questions Answered

    1. How do I move my old notes without it turning into a monster project?

    Don’t try to migrate everything at once. That’s a path to burnout. Instead, use a “just-in-time” approach. Only move a note from your old system to your new one when you actively need it for a current project. For everything else, create a single “Archive” folder in your old setup. This keeps your new workspace clean and relevant.

    2. Is it better to use a notebook or an app for creativity?

    Neither is inherently “better.” A hybrid approach works best for most people. Use an analog notebook for messy, initial brainstorming. The physical act can foster new connections. Then, transfer the refined, important ideas into your digital note taking system for long-term organization, search, and connection.

    3. How often should I actually look at my notes again?

    A system without a review process is just a digital graveyard. The single most important habit is the weekly review. Block out 30 minutes at the end of your week to process your inbox, file loose notes, and check in on active projects. This simple ritual keeps your system trustworthy and prevents digital clutter.

    4. What’s the biggest mistake people make when starting a new note taking system?

    The biggest mistake is “productivity procrastination.” This is when you spend more time tweaking your system—customizing themes, finding plugins, building elaborate folders—than actually using it. Start with the absolute simplest version. Your focus should be on building the habits of capturing and reviewing. An imperfect system you use daily is infinitely better than a perfect one you abandon.

    5. Can a good note taking system help with burnout or ADHD?

    Yes, it can be a powerful tool. A well-designed note taking system acts as an external brain. It reduces the cognitive load that contributes to burnout and feelings of being overwhelmed, which can be particularly helpful for managing ADHD symptoms. By getting tasks, ideas, and reminders out of your head and into a trusted place, you quiet mental chatter. However, this article is for educational purposes only. It is not a substitute for professional medical or psychological advice. If you are struggling with burnout, ADHD, or other mental health concerns, please consult a qualified healthcare provider. For more strategies on this topic, our book Burnout Breakthrough offers a practical roadmap.


    Disclaimer: This article contains affiliate links that may generate a commission for us at no extra cost to you. The content provided is for informational and educational purposes only and should not be considered medical or psychological advice. Always consult with a qualified professional for personal health concerns.

    Looking for a clear path to manage stress and prevent burnout? At Mind Clarity Hub, we create practical, science-backed books to help you find focus and balance.

    Explore Our Books on Burnout and Productivity

  • A Simple System for Organizing Your Photos and Reducing Clutter

    A Simple System for Organizing Your Photos and Reducing Clutter

    Organizing your photos isn’t just about shuffling files around. It’s about transforming a chaotic collection of duplicates and blurry shots. You can create a clear, usable archive. The goal is a central library that’s easy to search, a joy to browse, and simple to back up.

    Heads up: Purchases made through our links may earn us a small commission at no extra cost to you. We only recommend products we trust.

    Why Organizing Your Photos Is a Form of Self-Care

    Let’s be honest: staring at a camera roll with thousands of unsorted images can feel like a weight. For most of us, “organize photos” is just another chore on a to-do list that never seems to shrink. But tidying your digital memories is a powerful act of self-care. It’s a direct way to reduce mental friction and reclaim a bit of your focus.

    The hidden cost of digital clutter is real. From a neuroscience perspective, a disorganized photo library adds to cognitive load. This is the total mental effort your brain uses at any given moment. Every time you scroll through a messy album looking for one picture, your brain has to filter out irrelevant information. This process quietly drains your energy and focus.

    The Science Behind Digital Clutter and Your Brain

    This feeling of being overwhelmed isn’t just in your head. It’s a genuine psychological response to the scale of modern photo collections. The average person now snaps over 1,900 photos a year. This quickly leads to libraries of 10,000+ images. What’s worse, user surveys show that nearly 70% of these photos are left completely unorganized.

    This digital disarray directly impacts our ability to concentrate. Behavioral research links digital clutter to a significant drop in productivity. Endlessly scrolling through a chaotic camera roll can trigger dopamine loops similar to social media. This makes it hard to stop and even harder to focus afterward. This can be especially challenging for individuals managing conditions like ADHD.

    An untidy digital space also fuels decision fatigue. When you’re faced with thousands of nearly identical vacation shots, your brain makes countless tiny, draining decisions. Keep? Delete? Edit? Tag? This low-level stress can subtly chip away at your mood. It makes it harder to tackle more important tasks.

    This article is for educational purposes only. It is not a substitute for professional medical or psychological advice for conditions like ADHD, anxiety, or depression.

    By taking control of your digital photos, you are not just cleaning up files. You are creating a calm, accessible archive of your life’s best moments. This reduces the mental friction that comes from digital chaos.

    From Chore to Mindful Practice: How Organizing Photos Helps

    The first step is a mental shift. Instead of seeing this as one massive, daunting project, reframe it. See organizing your photos as a mindful practice. You can even use a time blocking planner to schedule short, 20-minute sessions. This makes the whole thing feel far more manageable.

    • Mini-Scenario: Imagine you need a photo of your dog from last summer for a birthday card. Instead of frantically swiping through hundreds of screenshots and random videos, you navigate to a folder: 2023 > 2023-07 July > Park Day with Rover. You find the perfect shot in seconds. That small, successful interaction provides a subtle mood boost, a concept supported by behavioral psychology. It frees up your mental energy for the actual card.

    This simple act of creating order where there was once chaos is surprisingly empowering. It’s a tangible way to practice digital wellness, much like a clear desk can lead to a clearer mind. We cover similar ideas in our guide on home office organizing ideas.

    Ultimately, organizing your photos is an investment in your future self. It ensures your most precious memories are preserved, accessible, and a source of joy, not stress.

    The Foundational System for Organizing Your Photos

    If you’re staring at a mountain of digital photos, the idea of “getting organized” can feel completely overwhelming. The secret isn’t aiming for perfection overnight. Instead, we need a simple, repeatable framework that actually creates momentum. Let’s break it down into a powerful three-part system: Cull, Categorize, and Consolidate.

    This isn’t just about tidying up. It’s about building a reliable system. This system lets you find and enjoy your most important memories without the digital chaos.

    Step 1: Cull Your Collection Ruthlessly

    Before you can organize anything, you have to declutter. Culling is the active, sometimes tough, process of deleting photos that add no real value. This isn’t about erasing memories. It’s about making the truly great ones shine. The relief from clearing out digital junk is real. Psychologically, it instantly reduces the number of decisions you have to make later.

    Your first pass should be quick and focused on the obvious clutter:

    • Duplicates: Those ten near-identical shots you took trying to get the perfect one. Be honest, pick the best, and delete the rest.
    • Blurry or Bad Photos: Out-of-focus images, accidental pocket shots, and poorly lit pictures. Let them go.
    • Screenshots and Memes: Unless a screenshot holds specific value, it doesn’t belong in your primary library. Move them to a separate “Utilities” folder or just delete them.

    Think of this as creating breathing room. It builds focus and momentum. This makes the bigger task ahead feel far more manageable.

    Step 2: Categorize with a Simple Structure for Organizing Photos

    Once you’ve trimmed the fat, it’s time to create order. A scalable folder structure is the backbone of any photo library that stands the test of time. The goal is a system so simple you can understand it at a glance, even years from now.

    A chronological hierarchy is, by far, the most effective method. It’s logical and requires no guesswork.

    • Main Folder: Create a single, top-level folder. Name it something obvious, like “Photo Library.”
    • Year Folders: Inside that main folder, create a folder for each year (e.g., 2023, 2024, 2025).
    • Event Subfolders: Within each year, create subfolders for specific events. A consistent naming convention like YYYY-MM Event Name is a game-changer (e.g., 2024-07 Summer Vacation).

    This simple journey is what takes you from digital chaos to a genuine sense of wellness. You gain control over your memories.

    Infographic showing a 3-step process for organizing your photos from clutter to joyful memories.

    Taking it one step further, you can rename the files inside these folders for ultimate searchability. A format like 2024-07-15_Summer-Vacation_001.jpg adds another layer of searchable clarity.

    Step 3: Consolidate All Your Scattered Memories

    Finally, you have to tackle photo fragmentation. Most of us have pictures scattered across old phones, various cloud accounts, and random USB drives. The final foundational step is to bring them all into one central hub.

    This hub could be a dedicated external hard drive or a primary computer folder. The specific tool is less important than the principle: one official, trusted location for all your photos.

    Mini-Scenario: A family has vacation photos on an iPhone, a partner’s Android phone, and an old digital camera. They create a folder named 2024-08 Italy Trip on their main external drive. They transfer all the photos from all three devices into this one folder. Only then do they start culling and sorting. This systematic approach prevents the frustration research shows 62% of users report when trying to find scattered files.

    By centralizing everything first, you create a complete inventory. This prevents a ton of future confusion. The clarity gained is similar to the structured thinking process detailed in our book, The Power of Clarity.

    How to Choose the Best Photo Organizing Software for You

    All the work you’ve done so far needs a place to live. The photo software you choose is that home. It can be a powerful ally or another digital chore.

    The secret isn’t picking the tool with the most bells and whistles. It’s about finding the one that actually fits your life.

    A modern desk setup for organizing your photos with two computer monitors, a tablet, keyboard, and notebook.

    Best for Busy Professionals vs. Casual Users

    Before you get lost comparing features, answer two honest questions:

    • What’s my number one goal? Am I looking for effortless cloud backup, pro-level editing, or total privacy?
    • How much time will I realistically spend on this? Do you need a “set it and forget it” solution, or do you enjoy fine-tuning your library?

    Your answers are your compass. They’ll help you cut through the marketing noise. A freelance photographer’s needs are worlds apart from a busy parent who just wants to find a video from the 2022 school play.

    Comparison: Which Photo Organization Tool to Buy First

    Here’s a look at popular tools for different needs. Think of this as a starting point.

    ToolBest ForKey FeaturePricing Model
    Google PhotosBeginners & casual usersExcellent AI search & generous free tier.Freemium
    Adobe LightroomPhotographers & professionalsAdvanced editing & deep metadata control.Subscription
    Mylio PhotosPrivacy-focused usersDevice-to-device syncing without mandatory cloud.Freemium
    Amazon PhotosAmazon Prime membersUnlimited full-res photo storage for Prime users.Included with Prime

    As you can see, there’s no single “best” option. It’s about the best fit for you. Once you have a direction, you can Compare options on each tool’s website to make a final call.

    A Closer Look at the Contenders

    Let’s dig into what makes each of these tools tick.

    Google Photos is the king of convenience. Its AI-powered search is almost magical. You can find images by typing in vague terms like “dog at the beach.” For most people who want a simple, automated way to back up their phone pictures, this is an incredible start.

    Adobe Lightroom is the professional standard. It gives you granular control over your library, from editing tools to keywording. If you’re a creator, its features are non-negotiable. The trade-off is a steeper learning curve and a subscription cost.

    Photo hoarding is real. In North America, 75% of users have a mix of old prints and digital files. Over half admit they have no real organization system. This often leads to “photo paralysis,” where the sheer volume feels too overwhelming to tackle.

    Mylio Photos strikes a fascinating balance, particularly for anyone worried about privacy. It builds a unified library from your phone, computers, and drives. It syncs them directly, device-to-device. Your photos don’t have to live on a public cloud server. This is a huge win for people who want total control over their personal data.

    Finally, Amazon Photos is a fantastic perk for Amazon Prime members. It offers unlimited, full-resolution photo storage, a massive value. If you’re in the Amazon ecosystem, it’s a cost-effective way to get a secure backup.

    Putting AI to work for you can dramatically reduce the time you spend manually organizing. For more on this, check out our guide on AI tools for productivity.

    How to Maintain Your Newly Organized Photos

    An organized photo library isn’t a one-and-done project. It’s a living thing. The secret to keeping it healthy is building a tiny, sustainable habit. This habit keeps your library tidy with almost no effort.

    The best way to make a new habit stick is to connect it to something you already do. Behavioral scientists call this habit stacking. You’re just latching a new behavior onto an existing one. For example: “After my weekly review on Fridays, I’ll spend 15 minutes sorting that week’s photos.” It removes the guesswork and makes the process feel almost automatic.

    Flat lay for organizing your photos on a wooden desk with coffee, notebook, smartphone, calendar, and a habit tracker journal.

    Building Your Maintenance Routine for Organizing Photos

    A simple maintenance checklist can make this process incredibly easy. Breaking it down into small weekly and monthly tasks helps you sidestep the overwhelm. Using a habit tracker journal can be a great visual cue. Physically checking off the task reinforces the new behavior in your brain.

    Your Weekly Photo Habit (15 Minutes)

    • Quick Cull: Open your phone’s camera roll or ‘New Imports’ folder. Do a fast pass and delete the obvious duds—blurry shots, accidental screenshots, and duplicates.
    • Move the Keepers: Select every photo you want to keep from the last seven days. Move them all into a single, temporary folder named 00_To-Sort.

    Your Monthly Photo Habit (30-45 Minutes)

    • Process the ‘To-Sort’ Folder: Sit down with your 00_To-Sort folder. Now, move all those images into their permanent homes inside your main library (e.g., 2024 > 2024-10 Fall Festival).
    • Rename and Tag (Optional but Worth It): As you file photos, add a few keywords or tags that matter. This makes your library incredibly searchable later.
    • Check Your Backups: Give your backup system a quick glance. Just confirm that your cloud service or external drive has successfully synced all the photos you just organized.

    This small, consistent effort compounds over time. Fifteen minutes a week prevents the digital clutter that leads to hours of stressful sorting down the road. Think of it as an investment in your future peace of mind.

    A Real-World Example in Action

    Let’s put this into practice. Imagine a freelance graphic designer who takes photos constantly. Her digital space can get chaotic, fast.

    She decides to stack her photo habit onto her existing Friday afternoon routine.

    Every Friday at 4:00 PM, she spends 15 minutes culling photos on her phone and computer. She deletes draft images and moves final client assets and personal pictures into her To-Sort folder.

    Then, on the first of every month, she processes that folder, filing everything away. This simple workflow keeps her client work organized and her personal memories safe. For more ideas, our guide on digital detox tips offers great strategies.

    Even with meticulous organization, hardware can fail. Knowing that professional hard drive data recovery services exist can be key to saving irreplaceable memories.

    Editor’s Take: The Honest Truth About Organizing Photos

    Here’s the honest truth: the most powerful photo organizing software is useless if you never open it. The best system is the one you’ll actually stick with.

    Don’t let the quest for a perfect, flawless archive stop you from just getting started.

    For most people drowning in a sea of unsorted files, the single most effective first step is beautifully simple. Carve out a basic folder structure on your computer or an external hard drive. Create one main “Photos” folder, and inside that, make folders for each ‘Year’. Then, add ‘Month’ folders inside those. Dragging your images into this simple hierarchy instantly creates immense order.

    Who This Straightforward Advice Is For

    This approach is designed for busy professionals, parents, and anyone who isn’t a professional photographer. The goal here is accessibility and simplicity, not a museum-grade archival system that takes a week to learn.

    The initial cleanup can feel like a big project. You can make it more manageable. You could even use an under desk walking pad to get some steps in while you sort through years of memories. This initial effort is a lot like the mental work it takes when you first learn how to organize your thoughts.

    Once you get through that first big sort, the ongoing upkeep is surprisingly light. A quick 15-minute session each week is all it takes to keep your photo library from ever becoming a mess again.

    The real win isn’t some flawless database with perfect keyword tags. It’s the quiet confidence of knowing exactly where your most cherished memories are. That feeling of control is worth every minute.

    Key Takeaways for Your Photo Organizing System

    After walking through every step, it’s easy to feel like you need to do everything at once. You don’t. The goal is a calm, consistent system that gives you back control over your most important memories.

    Let’s distill all that information down to the principles that truly matter.

    Your Action Plan for Photo Clarity

    The initial push is always the hardest part. Once you have a reliable workflow, maintaining it feels less like a chore. Focus on these core ideas to build momentum that lasts.

    • Cull Aggressively and Often: Your best tool is the “less is more” mindset. Curate the photos that truly matter. Get comfortable with deleting duplicates, blurry shots, and anything that doesn’t spark a genuine feeling.

    • Create a Simple Folder Structure: A chronological system is the most future-proof foundation. Start with a main “Photo Library” folder. Inside, create subfolders for each Year, then use a YYYY-MM Event Name format for folders within each year.

    • Pick the Right Tool for You: The best software is the one you will actually use. Choose based on your real needs—whether that’s simple sharing (Google Photos), creative control (Adobe Lightroom), or privacy (Mylio Photos).

    • Build a Small Maintenance Habit: Don’t let your hard work unravel. Attach a small sorting session to a habit you already have. Maybe every Sunday morning, you spend 15 minutes moving new photos to a ‘To-Sort’ folder.

    • Use Both Folders and Tags: This is a game-changer. Think of folders as the physical shelves of your library. Tags are the searchable, cross-referenced index. Folders provide the map (2024 > 2024-11 Thanksgiving), while tags handle the specific details (Aunt Carol, Turkey, Family).

    • Prioritize Your Backup Strategy: An organized library that isn’t backed up is a catastrophe waiting to happen. Lean on the proven 3-2-1 rule: keep three copies of your data, on two different types of media, with one copy stored offsite.


    The real victory isn’t achieving a perfectly tagged archive in a week. It’s the quiet confidence you feel knowing your cherished memories are safe, organized, and easy to find. That sense of control is a powerful form of mental clarity. For more strategies, See the book that fits your goal.


    Disclaimer: This article is for educational purposes only and is not a substitute for professional medical or psychological advice. It may contain affiliate links, which means we may earn a small commission on purchases at no extra cost to you.

    Photo Organizing FAQs: Common Questions, Honest Answers

    Even with a great system, you’re going to hit a few snags. That’s perfectly normal. When you’re staring down a decade of digital clutter, specific questions always pop up. Here are some of the most common ones we see, with practical answers to get you unstuck and back on track.

    How do I even start with thousands of old, unsorted photos?

    The single biggest mistake is trying to get it perfect from the start. Instead, aim for “good enough” progress. Forget about renaming every file or tagging every face right now. Just do this one thing: create a folder for each year on your hard drive. Then, drag every photo from a given year into the matching folder. That’s it. You’ve just created a foundational layer of order. You can always come back later to sort those yearly folders into months or events.

    What is the best way to scan and organize old printed photos?

    Your strategy should depend entirely on the size of your collection. If you have shoeboxes overflowing with thousands of prints, a professional scanning service is almost always worth the investment. It saves dozens of hours and gives you high-quality, consistent results. For smaller batches, a good flatbed scanner is your best friend. Look for one that can scan at at least 600 DPI. After you scan, edit the file’s metadata to change the “Date Taken” field to match when the original photo was actually taken. This ensures your scanned prints show up in the right place chronologically.

    Should I use tags, folders, or both to organize my photos?

    For a system that’s both flexible and built to last, you absolutely need to use both. They handle two very different jobs. Folders create the physical structure of your library: Year > Month > Event. Anyone can look at it and immediately understand the basic organization. Tags (or keywords) are for all the specific, searchable details that cut across those folders. You’ll use tags for people’s names (Aunt Carol), places (Paris), or activities (Hiking). Folders are the shelves; tags are the super-detailed index.

    How can I get my family on board with organizing photos?

    The secret to getting your family to participate is to make it incredibly easy. First, create a shared album in a service everyone already uses, like Google Photos or Amazon Photos. Dedicate it to one specific event, like a family reunion. Then, set one simple rule: each person can only add their top 5-10 photos from that event. This small constraint works wonders. It stops the shared album from turning into another digital junk drawer and forces everyone to curate their best shots.

    Is it safe to let AI organize my photos?

    For the major, reputable platforms—think Google, Apple, and Adobe—the short answer is yes, it’s generally safe. The AI features they use for organizing, like identifying faces and objects, are built with privacy as a core concern. Most processing happens either directly on your device or on secure, encrypted servers. That said, it’s always a good habit to spend a few minutes reviewing the specific privacy policy and settings for any photo service you decide to trust with your memories.

  • Second Brain Method: How to Build Your Digital Mind for Clarity & Productivity

    Second Brain Method: How to Build Your Digital Mind for Clarity & Productivity

    Feel like you’re drowning in a sea of notes, bookmarked articles, and ideas that vanish as quickly as they appear? If your digital life feels scattered across a dozen apps and notebooks, you’re not just disorganized—you’re experiencing a completely normal side effect of modern life.

    Our brains simply weren’t built to handle the constant flood of information we face every day. From a neuroscience perspective, this creates cognitive overload, jamming our limited working memory. This is where building a second brain comes in. It’s a method for externalizing your thoughts to regain focus and clarity.

    Disclosure: This article contains affiliate links. If you make a purchase through these links, we may earn a small commission at no extra cost to you. This helps support our work in creating valuable content.

    Taming Information Overload with the Second Brain Method

    The second brain method is a system for creating a trusted, external place for your ideas, notes, and resources. Think of it as an extension of your own mind. It’s designed to cut through the mental clutter. This frees up your biological brain to do what it does best: think, solve problems, and connect ideas.

    It’s not about hoarding information. Instead, it’s about building an organized, searchable knowledge base that actually serves you. This structured approach can be a powerful tool for anyone looking to achieve greater focus, as detailed in my book, The Power of Clarity.

    Second brain method shown by a man in a suit using a tablet with digital notes and a “Second Brain” label floating above.

    alt=”An American man in a suit uses a tablet to interact with his digital second brain method system.”

    From a brain science perspective, this process directly counters cognitive overload. Our working memory—the mental scratchpad we use for moment-to-moment thinking—is incredibly limited. When we try to hold onto every stray thought and project detail, that workspace gets jammed. Consequently, our ability to think deeply and creatively plummets.

    If that feeling is all too familiar, you can explore our guide on what cognitive overload is and how to manage it.

    Why Our Brains Need Help: The Second Brain Method Solution

    The sheer volume of information has exploded. Until the year 1900, the sum of human knowledge was estimated to double roughly every century. Today, it doubles about every 13 months. No one can keep all of that in their head. Therefore, a system becomes a necessity, not a luxury.

    Real-World Example: Imagine a marketing manager juggling three big projects. They have client feedback buried in emails and creative sparks from a podcast. They also have market research saved as random PDFs. Without a central system, these valuable insights stay disconnected and are easily lost. This can lead to feelings of overwhelm and even contribute to burnout, a topic I cover in Burnout Interrupted. A second brain acts as a hub to connect those dots. It frees the manager from the stress of trying to remember it all. This allows them to focus on high-level strategy and execution. This is the core benefit: moving from remembering to creating.

    The Four Pillars of the Second Brain Method

    This whole system is built on four simple, repeatable steps, easily remembered by the acronym CODE:

    • Capture: Get in the habit of saving what resonates. This could be anything—quotes, meeting notes, articles, or shower thoughts. The key is to have a quick, reliable way to get it out of your head.
    • Organize: Structure that information for action, not just for storage. This is where a simple framework like PARA (Projects, Areas, Resources, Archives) shines. It helps you sort notes based on how you’ll use them.
    • Distill: Find the essence of what you’ve saved. You don’t want to re-read entire articles later. Highlight key points and summarize core insights in your own words. Your future self can then grasp the value in seconds.
    • Express: Put your knowledge to work. Use your curated insights to create something new. This could be a report, a blog post, a presentation, or a smarter solution to a problem.

    By practicing these four steps, you turn passive information consumption into an active creative process. You build a personal knowledge asset that grows more valuable over time. This helps you move toward your goals with far more clarity and a lot less stress.

    Mastering Effortless Capture with the Second Brain Method

    The whole Second Brain system hinges on one simple habit: effortless capture. If saving an idea, a link, or a thought feels like work, you just won’t do it. The goal is to make capturing feel like a reflex, not a chore.

    This starts with picking the right tools. Not the most complex ones, but the ones that are always in arm’s reach. Digital apps like Notion, Evernote, or Obsidian are popular for a reason: they sync everywhere. That means your system is ready whether you’re at your desk or waiting for a coffee.

    Real-World Example: You’re listening to a podcast while walking your dog. A brilliant idea for a work project strikes you. Instead of trying to remember it, you use a voice memo app on your phone to dictate the thought immediately. The memo saves to your digital inbox. The idea is captured safely without interrupting your walk or causing anxiety about forgetting it.

    Calming Capture Anxiety with Your Second Brain

    Have you ever had a brilliant idea pop into your head, told yourself you’d remember it later, and then felt that sinking feeling as it slipped away? Behavioral research calls the mental tax of trying to remember everything “cognitive load.” This constant effort can subtly increase stress and anxiety.

    Our brains are for having ideas, not for holding them. As soon as you build a capture system you actually trust, you offload that burden. You’re essentially telling your brain the idea is safe and won’t be lost. This one act can quiet a surprising amount of background mental noise, freeing you up to focus.

    A dependable system doesn’t just organize your thoughts; it calms the part of your brain that’s worried about losing them. This frees up cognitive resources for deeper, more creative thinking.

    Setting Up Your Capture Toolkit

    To make this real, you need a “capture anywhere” setup. You should never have to stop and think about how to save something, only that you should.

    Here’s what a simple but powerful toolkit could look like:

    • On Your Computer: A dedicated app like Notion works great. Pair it with a web clipper extension for your browser. This lets you instantly save articles, links, and screenshots without derailing your workflow.
    • On Your Phone: Make sure your chosen app has a fast, reliable mobile version. Widgets are perfect for one-tap access to a new note. And don’t sleep on voice-to-text; it’s a game-changer for capturing ideas hands-free.
    • For Analog Ideas: Sometimes the best ideas start with pen and paper. A simple habit tracker journal on your desk is perfect for jotting down daily thoughts. You can always snap a photo of the page later and send it into your digital inbox.

    alt=”An American person at a desk quickly captures an idea for their second brain method.”

    What Should You Capture in Your Second Brain?

    The short answer is simple: anything that resonates. Don’t filter yourself. Don’t overthink it. The point of capture isn’t to build a pristine, perfectly curated library from day one. It’s about gathering the raw materials that spark your curiosity and intellect.

    Toss these kinds of things into your inbox:

    • Quotes that make you pause and think.
    • Screenshots of compelling designs or charts.
    • Links to articles or videos you want to explore later.
    • Those random shower thoughts or “aha!” moments.
    • Quick, actionable notes from meetings or calls.
    • Highlights and annotations from the books you’re reading. If you’re looking for a solid framework for this, check out our guide on how to take notes from a book effectively.

    Ultimately, mastering capture is about building trust. Once you truly believe that every valuable piece of information has a safe home, you give your brain permission to let go. This allows you to focus on what’s right in front of you. It’s a foundational habit that paves the way for the clarity and creative output I detail in my book, Focus Recharged.

    Organizing Your Second Brain with the PARA Method

    Just capturing ideas isn’t enough. Without a simple, intuitive way to organize everything, your second brain can quickly turn into a digital junk drawer. It becomes a place where good ideas go to be forgotten. This is where the PARA method comes in.

    Developed by Tiago Forte, PARA is a refreshingly simple system for organizing your digital information. It stands for Projects, Areas, Resources, and Archives. The genius here is that it sorts information based on how actionable it is, not by some rigid category. This tweak alone makes your notes immediately more useful.

    The goal is to get thoughts out of your head and into a trusted system with as little friction as possible.

    An infographic illustrating the effortless capture process: Idea (brain), Tools (smartphone), and Action (refresh icon).

    This visual captures the core habit: moving a thought from your mind (Idea) through a device you trust (Tool) and into your system (Action). Then, it’s ready to be sorted using PARA.

    Breaking Down the PARA Categories for Your Second Brain

    Really understanding the difference between these four categories is the key to making the whole system click. It’s not about creating dozens of folders. Instead, it’s about having four main buckets that tell you where something belongs based on how you plan to use it.

    Here’s a quick breakdown to make the distinctions clear.

    Understanding The PARA Method At A Glance

    Category

    Definition

    Real-World Example

    ProjectsShort-term efforts with a specific goal and deadline.Complete website redesign, Plan family vacation, Finish online course.
    AreasLong-term responsibilities or standards you want to maintain.Finances, Health & Wellness, Professional Development, Home Management.
    ResourcesTopics of ongoing interest or themes you are researching.AI productivity, Stoic philosophy, Coffee brewing techniques, Digital marketing trends.
    ArchivesInactive items from the other three categories.Completed projects, outdated areas, resources you no longer need.

    This structure is dynamic, meaning information flows naturally between the categories. When a project is done, its folder moves to Archives. If a resource becomes critical for an ongoing responsibility, its notes might shift into an Area. This flexibility keeps your second brain from becoming stale.

    PARA in Action: A Freelance Writer’s Scenario

    Let’s make this concrete. Imagine you’re a freelance writer named Alex who wants to better manage their workflow.

    • Projects: Alex has a folder for “Client X Blog Post Series,” due next month. Inside are research articles, interview notes, and draft outlines. Another project is “Update Professional Portfolio,” which has a clear end date.
    • Areas: Alex maintains an “Area” called “Business Finances” to track invoices and expenses—an ongoing responsibility. Another Area is “Client Relationships,” which holds notes from recurring calls and client preferences.
    • Resources: Alex is curious about productivity, so they have a “Resource” folder named “AI Writing Tools.” Here, they save articles and tutorials. It’s just a topic of interest, not tied to a specific project.
    • Archives: Last year’s “Client Y Website Copy” project folder now lives in Archives. The project is finished, but the information is still searchable if Alex ever needs it. This system is key for creative professionals, a focus of my book The Focused Freelancer.

    By organizing this way, Alex knows exactly where to find what they need, when they need it. Active work is in Projects. Ongoing standards are in Areas. And general knowledge is in Resources. If you’re looking for more ways to structure your thoughts, you might find our guide on how to organize your thoughts for greater clarity helpful.

    Keeping Your PARA System Lean and Effective

    The most common mistake people make is over-categorizing. You really don’t need a folder for every single topic under the sun. Keep your top-level folders limited to just Projects, Areas, Resources, and Archives.

    The goal of PARA isn’t to create a perfect, museum-quality filing cabinet. It’s to reduce the friction between having a thought and knowing where to put it. Fewer choices mean faster organization and less decision fatigue, a key psychological principle for building sustainable habits.

    The widespread adoption of this system speaks volumes. Tiago Forte’s Building a Second Brain has sold over 400,000 copies worldwide. This isn’t just a fleeting trend; it shows that people are finding real, lasting value in frameworks like PARA. Exploring various efficient note taking systems can significantly boost your personal knowledge management. Ultimately, PARA helps you build a second brain that actively serves you.

    Turning Your Notes Into Actionable Insights

    So you’ve started capturing and organizing. That’s a huge first step. But a second brain filled with unread articles and raw notes is just a prettier junk drawer. It feels productive, but it doesn’t create anything on its own.

    The real magic happens when you move from passive collection to active creation. This is where the last two steps of the CODE framework, Distill and Express, come in. This is how you make your knowledge work for you.

    Second brain method shown in an open notebook with handwritten notes, a pen, and a yellow “Idea” sticky note.

    The goal is to turn your notes into springboards for action. Don’t let them become a mausoleum of forgotten ideas.

    Finding the Essence with Progressive Summarization

    The key technique for distilling your notes is Progressive Summarization. It’s a simple, multi-layered way to make a dense wall of text instantly scannable for your future self. Instead of re-reading an entire article every time, you can grab its essence in seconds.

    The best part? It unfolds naturally over time, whenever you happen to revisit a note.

    • Layer 1: The Bold Pass. The first time you review a captured note, just bold the most interesting sentences. This first pass immediately draws your eye to what mattered most in the moment. Simple.
    • Layer 2: The Highlight Pass. Sometime later, you might open that note again. This time, read only the bolded sentences and highlight the absolute best parts among them. You’re finding the gems within the gems.
    • Layer 3: The Executive Summary. Finally, after reviewing your highlights, write a one or two-sentence summary at the top of the note in your own words. This is the ultimate distillation, the core idea you can grab and use.

    This layered approach is a gift to your future, frazzled brain. You can engage with a note at any level—glance at the summary for the gist, scan the highlights for key points, or read the bolded text for more context. It’s designed for speed.

    When you build this habit, every piece of information in your second brain becomes more valuable. If you want to go deeper on making ideas stick, our guide on how to retain what you read is a great next step.

    From Distilled Notes to Creative Expression

    With a library of distilled, summarized notes, the final step—Express—stops feeling so intimidating. You’re no longer staring at a blank page. You’re assembling pre-built intellectual legos that you’ve already polished.

    Real-World Example: Let’s say a content creator named Sarah wants to write an article on “AI productivity.”

    Her workflow is now completely different:

    1. Search: Sarah opens her notes app and searches for the tag “#AI.”
    2. Review: In minutes, she skims the executive summaries of a dozen relevant notes she’s progressively summarized. No re-reading entire articles.
    3. Assemble: She drags the most potent highlighted quotes, bolded statistics, and her own summary insights into a new outline.
    4. Connect: Seeing all the key ideas in one place, she spots a new connection between two notes. That becomes the unique angle for her article.
    5. Create: With a rich outline full of distilled insights, writing the actual blog post becomes a much simpler task of connecting the dots.

    This process turns creation from a daunting chore into a manageable assembly project. She isn’t just regurgitating information; she’s using her curated knowledge to form new, original insights. The key to making this a real practice is scheduling it. Using a time blocking planner can help you carve out dedicated “creation sessions” each week.

    Enhancing Your Second Brain Method with AI

    The classic Second Brain method gives you a rock-solid foundation for managing knowledge. However, modern technology offers a powerful way to accelerate the process. Think of artificial intelligence as an intellectual partner—a tool that helps you process, connect, and retrieve information faster than ever before.

    This isn’t about replacing your thinking. It’s about augmenting it.

    AI tools can supercharge every single step of the CODE framework. Before you even capture an article, you could ask an AI tool to generate a quick summary. This simple step helps you decide if the full text is even worth saving. This makes your capture process smarter from the very beginning.

    Real-World Example: Imagine asking your digital system, “What are the common themes between my notes on stoicism and my notes on project management?” AI-integrated note-taking apps are already making this a reality. They can scan your entire knowledge base, spot hidden connections, and suggest relationships you might have missed. This turns your Second Brain from a passive archive into an active collaborator.

    Mindful Integration of AI into Your Workflow

    As these tools become more common, it’s critical to use them mindfully. The goal is to assist your thinking, not outsource it. This means creating an environment that supports deep focus, even when you’re using AI. Something as simple as putting on a pair of noise canceling headphones can help you block out distractions. This practice of managing your environment is a key concept in my book, Digital Clarity.

    This focused approach is more important than ever. AI adoption is exploding; nearly one in five Americans now use AI daily. A staggering 75% of employed adults have used AI tools in the last six months. Knowledge workers are weaving these tools into their Second Brain workflows to speed up pattern recognition. You can learn about the state of consumer AI to see just how fast this is moving.

    Practical AI Workflows for Your Second Brain

    Getting started with AI doesn’t have to be a massive project. You can begin with a few simple, high-impact workflows that save you time and deepen your insights right away.

    Here are a few practical ways to begin:

    • Automated Tagging: Many modern apps can look at your notes and automatically suggest relevant tags. This one feature can save a surprising amount of organizational time.
    • Intelligent Search: Move beyond basic keyword searches. Start using natural language to ask your Second Brain real questions. For example, “Show me all notes from last year related to marketing that mention budget constraints.”
    • Content Repurposing: Feed your distilled notes on a topic to an AI. Then, ask it to generate a first draft of a blog post, a social media thread, or a presentation outline. You provide the core insights; the AI handles the initial grunt work.
    • Idea Generation: Feeling stuck? Use an AI as a brainstorming partner. Give it a few of your core ideas and prompt it to suggest alternative angles, counterarguments, or related topics you haven’t considered.

    Having a well-organized Second Brain is a massive advantage here. It provides the structured, high-quality data that AI models need to produce genuinely relevant and useful outputs. Your curated knowledge becomes the fuel for the AI engine.

    To get even more out of this, you might explore some of the best AI content creation tools that can help you process information more efficiently. If you want to go deeper on this topic, check out our guide on how to use AI for productivity.

    Editor’s Take

    The Second Brain method is genuinely transformative for knowledge workers, creators, or anyone feeling buried under information. Its real power lies in building an external system you trust. Once you stop trying to hold every idea in your head, the background hum of anxiety starts to fade. This frees up an incredible amount of mental space for the deep thinking that actually matters.

    Who is it best for? This system is ideal for people who work with ideas—writers, marketers, researchers, students, and entrepreneurs. If your job involves synthesizing information to create something new, this is for you.

    What actually works? The PARA organization system is the most immediately useful part. It just makes sense. However, the true, long-term benefit comes from the consistent habit of “Progressive Summarization.” Distilling your notes over time is what turns your archive into a powerhouse of usable insights.

    Important Caveats: This is not a magic bullet. It requires upfront effort and the discipline to capture information consistently. If you already find complex digital tools draining, you might be better off with a simple productivity journal. Also, I recommend mastering the core habits of CODE and PARA before adding the complexity of AI tools. Get the foundation right first.

    Key Takeaways

    • Externalize Your Mind: The core idea is to offload information from your biological brain into a trusted digital system. This reduces cognitive load and frees up mental resources for creativity and problem-solving.
    • Follow the CODE Framework: Use this four-step process as your workflow: Capture what resonates, Organize for action, Distill the essence, and Express your ideas.
    • Organize for Action with PARA: Structure your digital life into four simple categories: Projects (active goals), Areas (ongoing responsibilities), Resources (topics of interest), and Archives (inactive items).
    • Distillation is Key: Use Progressive Summarization (bolding, highlighting, summarizing) to make your notes more valuable and easily scannable for your future self.
    • AI is a Supercharger, Not a Replacement: Leverage AI tools to speed up tasks like summarizing, tagging, and finding connections, but always keep your human curation and critical thinking at the center of the process.

    Disclaimer: This article contains affiliate links, which means we may earn a small commission if you make a purchase at no extra cost to you. The content provided here is for educational and informational purposes only. It is not intended as a substitute for professional medical or psychological advice, diagnosis, or treatment. Always seek the advice of your physician or other qualified health provider with any questions you may have regarding a medical or mental health condition.

    Frequently Asked Questions (FAQ)

    1. What is the best app to start a second brain?

    There’s no single “best” app. The right tool is the one that feels most intuitive to you. Popular choices include Notion (for flexibility and customization), Evernote (for simple, powerful capture and search), and Obsidian (for connecting ideas through backlinks). The most important factor is choosing an app you will use consistently.

    2. How is the second brain method different from just taking notes?

    Traditional note-taking is often passive collection. The Second Brain method is an active system designed for action and creation. It emphasizes organizing notes based on their actionability (using the PARA method) and distilling them over time to make them more useful. The goal is not just to store information, but to connect ideas and produce new work.

    3. Can I use a physical notebook for my second brain?

    Absolutely. An analog system, like using a dedicated notebook or journal, is excellent for focused, distraction-free thinking. Many people use a hybrid approach: a physical notebook for brainstorming and daily notes, and a digital app for long-term storage, searchability, and storing web content. Using a great ergonomic keyboard can also make the digital part of this process much more comfortable.

    4. How long does it take to build a second brain?

    You can set up the basic structure (choosing an app and creating your four PARA folders) in less than an hour. However, building a truly valuable second brain is a continuous practice, not a one-time project. The system grows and becomes more powerful as you consistently build the habit of capturing and distilling information over weeks and months.

    5. What if I feel overwhelmed by my existing notes? Should I organize them all at once?

    No, do not try to organize everything at once. This is a common mistake that leads to burnout. Start fresh with the PARA system. Create your new folders and begin putting new information into them. Only migrate and organize old notes on an as-needed basis—when you need to refer to something specific from your old system. This makes the transition manageable and much less intimidating. For a deeper look at managing digital overwhelm, check out my book on Reclaiming Silence.