
...

Tag: fridge organization

  • Roommate-Friendly Fridge Labeling System to Cut Waste

    Roommate-Friendly Fridge Labeling System to Cut Waste

    Sharing a kitchen gets easier when you set up a roommate-friendly fridge labeling system to cut food waste. This guide shows how to map clear zones, add simple date dots, and run a fast weekly reset so everyone eats what they buy and nothing gets lost in the back. You will leave with house rules you can agree on, a low-friction starter kit, and a 10-minute routine that prevents spoiled leftovers and roommate drama. Put simply, the system turns your fridge into a clear map that reduces friction, saves money, and supports food safety.

    Key takeaways for a roommate fridge labeling system

    • Use a roommate-friendly fridge labeling system to cut food waste with three pillars: zones, date dots, and a FIFO β€œEat Me First” bin.
    • Run a fast 10-minute weekly reset so labels stay current and the oldest foods move up front.
    • Keep rules kind and visible, and set the fridge to 40Β°F (4Β°C) or below for safety (FDA).
    Spilled groceries on a kitchen floor highlight avoidable food waste in shared homes.
    Food waste is often a systems problem, not a people problem. Photo: Ron Lach / Pexels

    Why a roommate-friendly fridge labeling system to cut food waste works

    Most β€œclean out the fridge” fights come from unclear ownership, mystery dates, and random shelf chaos. A simple, shared system lowers the effort required to store and find food. When the shelf map is obvious, labels are quick to add, and the oldest items are front and center, people make better choices without extra nagging. This roommate-friendly fridge labeling system to cut food waste works because it reduces cognitive load and turns good habits into the default.

    Clarity reduces judgment calls. If a bin says β€œEat Me First,” you don’t have to wonder what to grab. If a container shows a bold date and initials, you don’t have to ask whose lunch it is. Because the path is visible, the right action takes less time than the wrong one.

    Visual management scales in small spaces. Apartments often have narrow shelves and dim lighting. High-contrast dots and a single, central FIFO bin create a visual hierarchy: what to eat now sits at eye level, while raw ingredients and long-life condiments sit lower or on the door.

    Fair norms prevent resentment. Agreements like β€œdoor condiments are shared unless named” remove awkward messaging and keep expectations steady for everyone, including guests. Short, friendly rules travel well across schedules and personalities.

    Finally, reducing confusion about date labels helps you waste less. In the U.S., common dates like β€œBest if Used By” speak to quality rather than safety (infant formula is a notable exception). Understanding the difference prevents tossing food too early while staying safe. See the USDA’s guide on Food Product Dating.

    What you’ll set up today in a roommate fridge labeling system

    • Zones: A shelf map for shared vs. personal items, plus a clear β€œEat Me First” bin.
    • Date dots: A color-and-date label that takes seconds to add.
    • FIFO habit: Oldest items move forward each week.
    • Rules: Short, friendly shelf rules everyone agrees to.

    How to map roommate zones for shared fridge labeling to reduce waste (and why placement matters)

    Zones make the fridge predictable. People put things back where they found them. That stability is half the win. Start with three layers of intent: ready-to-eat in the middle, raw-to-cook low, and personal items up top for quick access.

    Top shelf: Create clearly named personal areas or small labeled bins. This protects meal-prep containers, specialty items, and snacks that shouldn’t be shared without asking.

    Middle shelf: Put shared, ready-to-eat foods here and place a bold β€œEat Me First” bin in the front-center. This location is prime: it wins the eye every time the door opens.

    Lower shelf: Keep raw ingredients here, sealed and contained to avoid drips. Heavier items sit safely on sturdier, colder shelves.

    Drawers: Use crisper drawers for produce by type (for example, greens separate from fruit if you can). Prepped produce can get a green dot to show it’s been washed or cut.

    Door: Store condiments and stable drinks. Avoid keeping milk on the door because it warms each time the door opens.

    For food safety, set the refrigerator to 40Β°F (4Β°C) or below and the freezer to 0Β°F (-18Β°C). Warmer temps increase spoilage and risk. See USDA FSIS: Refrigeration and Food Safety and the FDA’s storage guidance FDA safe food storage guidance. Zones make your roommate-friendly fridge labeling system to cut food waste obvious at a glance, even when you’re tired.

    Fridge area What goes here Label cue
    Top shelf Personal bins (by roommate) Name + color dot
    Middle shelf (front) β€œEat Me First” bin Red dot + date
    Middle shelf (back) Shared leftovers Blue dot + date
    Lower shelf Raw ingredients (sealed) Green dot + date
    Crispers Produce Green dot only when prepped
    Door Condiments, stable drinks Name if personal

    Date dots in a roommate fridge labeling system: the 5-second label that pays for itself

    Your labels should be quicker than sending a text. Aim for a 5-second habit: write a date, add a color, stick it on the front.

    • What to write: Month/Day (e.g., 6/27) and your initials.
    • Color code: Pick one color per roommate or use weekday colors (Mon=Blue, Tue=Green, Wed=Yellow, Thu=Orange, Fri=Red, Sat=Purple, Sun=Gray). Post the legend on the fridge door.
    • Where to place: The front of the container, so the label stays visible when stacked.

    Confusion over dates creates waste. β€œSell By” is for the store. β€œBest if Used By” signals peak quality. These labels are not safety dates for most foods. Learn the difference via USDA FSIS and consult the FoodKeeper App for typical storage times. Choose a thick-tip marker for visibility and press labels onto a dry surface for better adhesion. A consistent labeling spot makes the roommate-friendly fridge labeling system to cut food waste faster to scan in seconds.

    Label option Best for Pros Watch-outs
    Dissolvable labels Leftovers, glass/plastic Rinse off cleanly May fade in damp fridges
    Freezer-grade labels Batch cooking Stick in cold temps Harder to remove
    Masking tape + marker Any container Cheap, universal Residue if left long
    Dry-erase on hard bin β€œEat Me First” bin Fast, reusable Smears if touched

    The FIFO β€œEat Me First” bin in a fridge label system for roommates

    FIFO means β€œFirst In, First Out.” Put the oldest ready-to-eat items in one clear bin labeled β€œEat Me First,” front and center. During meals, shop this bin first. If you cook, plan a side that uses something from it.

    • Placement: Middle shelf, front row.
    • Label: Big, friendly letters + today’s date. Add a red dot to signal urgency.
    • Capacity: One bin per fridge is enough. When it’s full, plan a β€œbin dinner.”

    β€œBin dinner” ideas can be simple: a salad built from a half cucumber, a remaining roast chicken thigh, and a leftover lemon; or tacos that use the last cup of beans, a few tortillas, and a salsa jar. Because the bin narrows your choices, it’s easier to act than to overthink.

    Rules for a roommate fridge labeling system (simple and fair)

    Rules prevent surprises. Keep them short and visible.

    • Personal bins: Name on the bin. Everything inside is yours unless it has a β€œShared” tag.
    • Shared shelf: Only items with a date dot and no name, or a simple β€œShared” note.
    • Unlabeled items: Move to the β€œEat Me First” bin during the weekly reset. If not claimed by next reset, it’s fair to compost or toss.
    • Condiments: Door is considered shared unless named.

    Post these on the fridge door. A photo of the shelf map plus the legend beats a long paragraph everyone will ignore. Rules like these keep the roommate-friendly fridge labeling system to cut food waste fair, friendly, and low-drama.

    For different diets or allergies, add one line: β€œAsk before using named items; respect allergy notes.” This small addition builds trust and keeps safety top of mind.

    How to build a roommate-friendly fridge labeling system to cut food waste

    1. Clear space fast: Remove obvious trash, wipe shelves, and set the fridge to 40Β°F (4Β°C) or below (USDA FSIS).
    2. Place zones: Personal bins up top, shared leftovers mid-back, β€œEat Me First” mid-front, raw ingredients low.
    3. Make the legend: Choose color codes and post them.
    4. Label everything new: When food enters the fridge, it gets a date dot and initials before it’s set down.
    5. Start FIFO: Move oldest items forward. Add the top three to tonight’s plan.
    6. Agree on rules: Keep them on one card. Sign or emoji-react in the roommate chat.

    Assign light roles to speed it up: one person wipes while another labels, then you switch. Because the steps are short and visible, the whole setup can finish in under 30 minutes even in a packed apartment fridge.

    Workflow for a roommate fridge labeling system at a glance

    This simple visual maps what happens to food the moment it enters the kitchen. Arrive: Groceries or leftovers hit the counter. Label: Add color + date + initials (5 seconds). Place: Put into the right zone (personal, shared, or β€œEat Me First”). Reset: A weekly 10-minute sweep moves the oldest forward. Enjoy: Plan meals around the β€œEat Me First” bin.

    Tip: Keep dots, a marker, and the legend in a small magnetic caddy on the door.

    The 8-piece starter kit for a fridge label system for roommates (low-cost, low-fuss)

    Item Why it helps
    2–4 labeled personal bins (one per roommate) Makes ownership obvious and prevents mix-ups
    1 clear β€œEat Me First” bin (shoebox-size) Centers FIFO so it’s the first thing you see
    Dissolvable labels or masking tape + bold marker Fast, legible, low mess when washing
    Small color dot stickers (or colored markers) Quick visual cue for dates or owners
    Magnetic pen/label caddy for the door Keeps tools exactly where you use them
    Fridge thermometer (if display is unreliable) Confirms safe temperature at a glance
    Printed legend and rules card Creates shared norms without long chats

    Set everything where people naturally reach: the date dots and marker live at eye level. The β€œEat Me First” bin gets the prime front spot so it’s impossible to miss. With these tools, your roommate-friendly fridge labeling system to cut food waste becomes the default behavior, not extra work.

    DIY tip: If your shelves are textured or damp, dry the surface before sticking a label, or place the label on the container rather than the shelf. This keeps dots legible until the weekly reset.

    The weekly 10-minute reset for a roommate fridge labeling system (schedule it, then keep it light)

    Pick a predictable timeβ€”Sunday night after dinner works for many homes. Turn on music, set a 10-minute timer, and do this together:

    1. Scan the β€œEat Me First” bin: Plan tonight’s snack or tomorrow’s lunch around two items.
    2. Move oldest forward: FIFO items slide to the front, freshest to the back.
    3. Relabel smudged dots: Replace anything hard to read.
    4. Wipe shelves fast: 60-second wipe of drips and crumbs.
    5. Log 1–2 β€œuse-up” ideas: Post a quick list on the door.

    That’s it. A reset this short sustains the roommate-friendly fridge labeling system to cut food waste week after week. If someone can’t attend, send a quick photo of the FIFO bin to the chat so they can help plan a use-up meal.

    Calendar nudge: Add a repeating event with a cheerful name like β€œFridge Sprint.” Light tone helps everyone show up without feeling policed.

    Daily micro-habits for shared fridge labeling to reduce waste

    • Label before placing: No item touches a shelf without a date dot and initials.
    • Open? Label it: The moment a seal breaks, the dot goes on.
    • One glance rule: If you can’t read the date from the front, fix it.
    • Meal plan check: Look at the β€œEat Me First” bin while making coffee.

    Habit-stack these moves with routines you already doβ€”like unloading groceries or brewing teaβ€”so your roommate-friendly fridge labeling system to cut food waste becomes automatic.

    Food date facts that reduce waste (and keep you safe)

    Knowing how to read dates prevents both waste and risk.

    • β€œBest if Used By/Before” = quality. Food may still be safe after this if stored properly (USDA FSIS).
    • β€œSell By” = for the store. Not a safety date for consumers.
    • Infant formula is the exception: use-by dates are strict for safety and nutrition (USDA FSIS).
    • Use the FoodKeeper App to check typical storage times at a glance.
    Common refrigerator storage times (general guidance)
    Food Typical fridge time Notes
    Cooked leftovers 3–4 days Reheat to steaming hot before eating
    Opened deli meat 3–5 days Keep tightly sealed
    Fresh whole eggs 3–5 weeks Keep in original carton, not on door
    Cooked poultry 3–4 days Store in shallow containers

    Place raw meat on the lowest shelf in a tray to prevent drips onto ready-to-eat foods. Keep produce dry until you prep it; moisture speeds decay. See detailed guidance at USDA FSIS and the FoodKeeper App. For home strategies to curb waste, the EPA offers ideas EPA wasted food reduction guidance.

    See this roommate fridge labeling system in 60 seconds

    If the video doesn’t load, watch it on YouTube. Watch with roommates so you can agree on shelf zones together.

    House agreement for a roommate fridge labeling system

    One card. 60 words. Everyone signs or reacts in the group chat.

    Example: β€œWe’ll use color date dots + initials on anything we add to the fridge. Personal bins on the top shelf are private. The middle front bin is β€˜Eat Me First’ and we’ll check it before cooking. Each Sunday night we do a 10-minute reset. Unlabeled food moves to β€˜Eat Me First’ and gets tossed next week if still there.” This tiny agreement anchors your routine without a long meeting and supports a roommate-friendly fridge labeling system to cut food waste from day one.

    Troubleshooting your fridge label system for roommates

    When something breaks, assume the system needs a tune-upβ€”not that someone β€œdoesn’t care.”

    • β€œI forgot to label.” Put dots + marker in a door caddy at eye level. Add a tiny sticky note: β€œLabel before shelf.”
    • β€œLabels fall off.” Switch to masking tape on textured containers; try freezer-grade labels for very cold zones.
    • β€œFIFO bin is always full.” Cap it to one bin. Plan a β€œbin dinner” and feature those items in the weekly reset.
    • β€œWho owns this sauce?” Door is shared unless named. Sharpie a name once and you’re done.
    • β€œWe keep tossing food.” Add a whiteboard list: β€œUse-up plan.” Rotate the top three items each week.

    Use kind language. Try: β€œCan we make labels even easier to reach?” rather than β€œWhy didn’t you label this?” That tone sustains a roommate-friendly fridge labeling system to cut food waste far better than lectures.

    FAQs: roommate fridge labeling system

    What do the food date labels really mean?

    β€œBest if Used By/Before” refers to peak quality; it’s not a safety deadline for most foods. β€œSell By” is for retailers. Infant formula is different: respect the use-by date strictly. For details, see USDA FSIS.

    What fridge temperature should we use?

    Keep the fridge at 40Β°F (4Β°C) or below and the freezer at 0Β°F (-18Β°C). This slows bacterial growth and helps food last closer to its expected timeframe. Guidance from USDA FSIS and the FDA.

    How long can leftovers stay safe in the fridge?

    General guidance is 3–4 days for most cooked leftovers if stored promptly and kept cold. Reheat to steaming hot. Use the FoodKeeper App to check typical storage times for specific foods.

    What containers work best with labels?

    Flat-sided glass or sturdy plastic with smooth fronts. If you meal prep, standardize container sizes so dots always sit in the same place. That makes the roommate-friendly fridge labeling system to cut food waste faster to read.

    How do we handle guests or short-term subletters?

    Give them a temporary color and a small personal bin. Add two lines to the rules card for the dates they’re staying.

    Compare common label choices for a fridge label system for roommates

    Type Works on Removal Cost Best use
    Dissolvable Glass, plastic Rinses off $$ Daily leftovers
    Freezer-grade Any, cold temps Peels with effort $$$ Batch/freezer meals
    Masking tape Anything Peels, may leave glue $ Budget setups
    Dry-erase on bin Hard plastic bin Wipes off $ β€œEat Me First” dates

    Optional tools for a roommate-friendly fridge labeling system to cut food waste

    Affiliate disclosure: Some links in this guide may be affiliate links. If you buy through them, Mind Clarity Hub may earn a commission at no extra cost to you.

    Want a head start? Consider dissolvable food labels and a simple refrigerator thermometer. These two items keep your roommate-friendly fridge labeling system to cut food waste fast, readable, and food-safe.
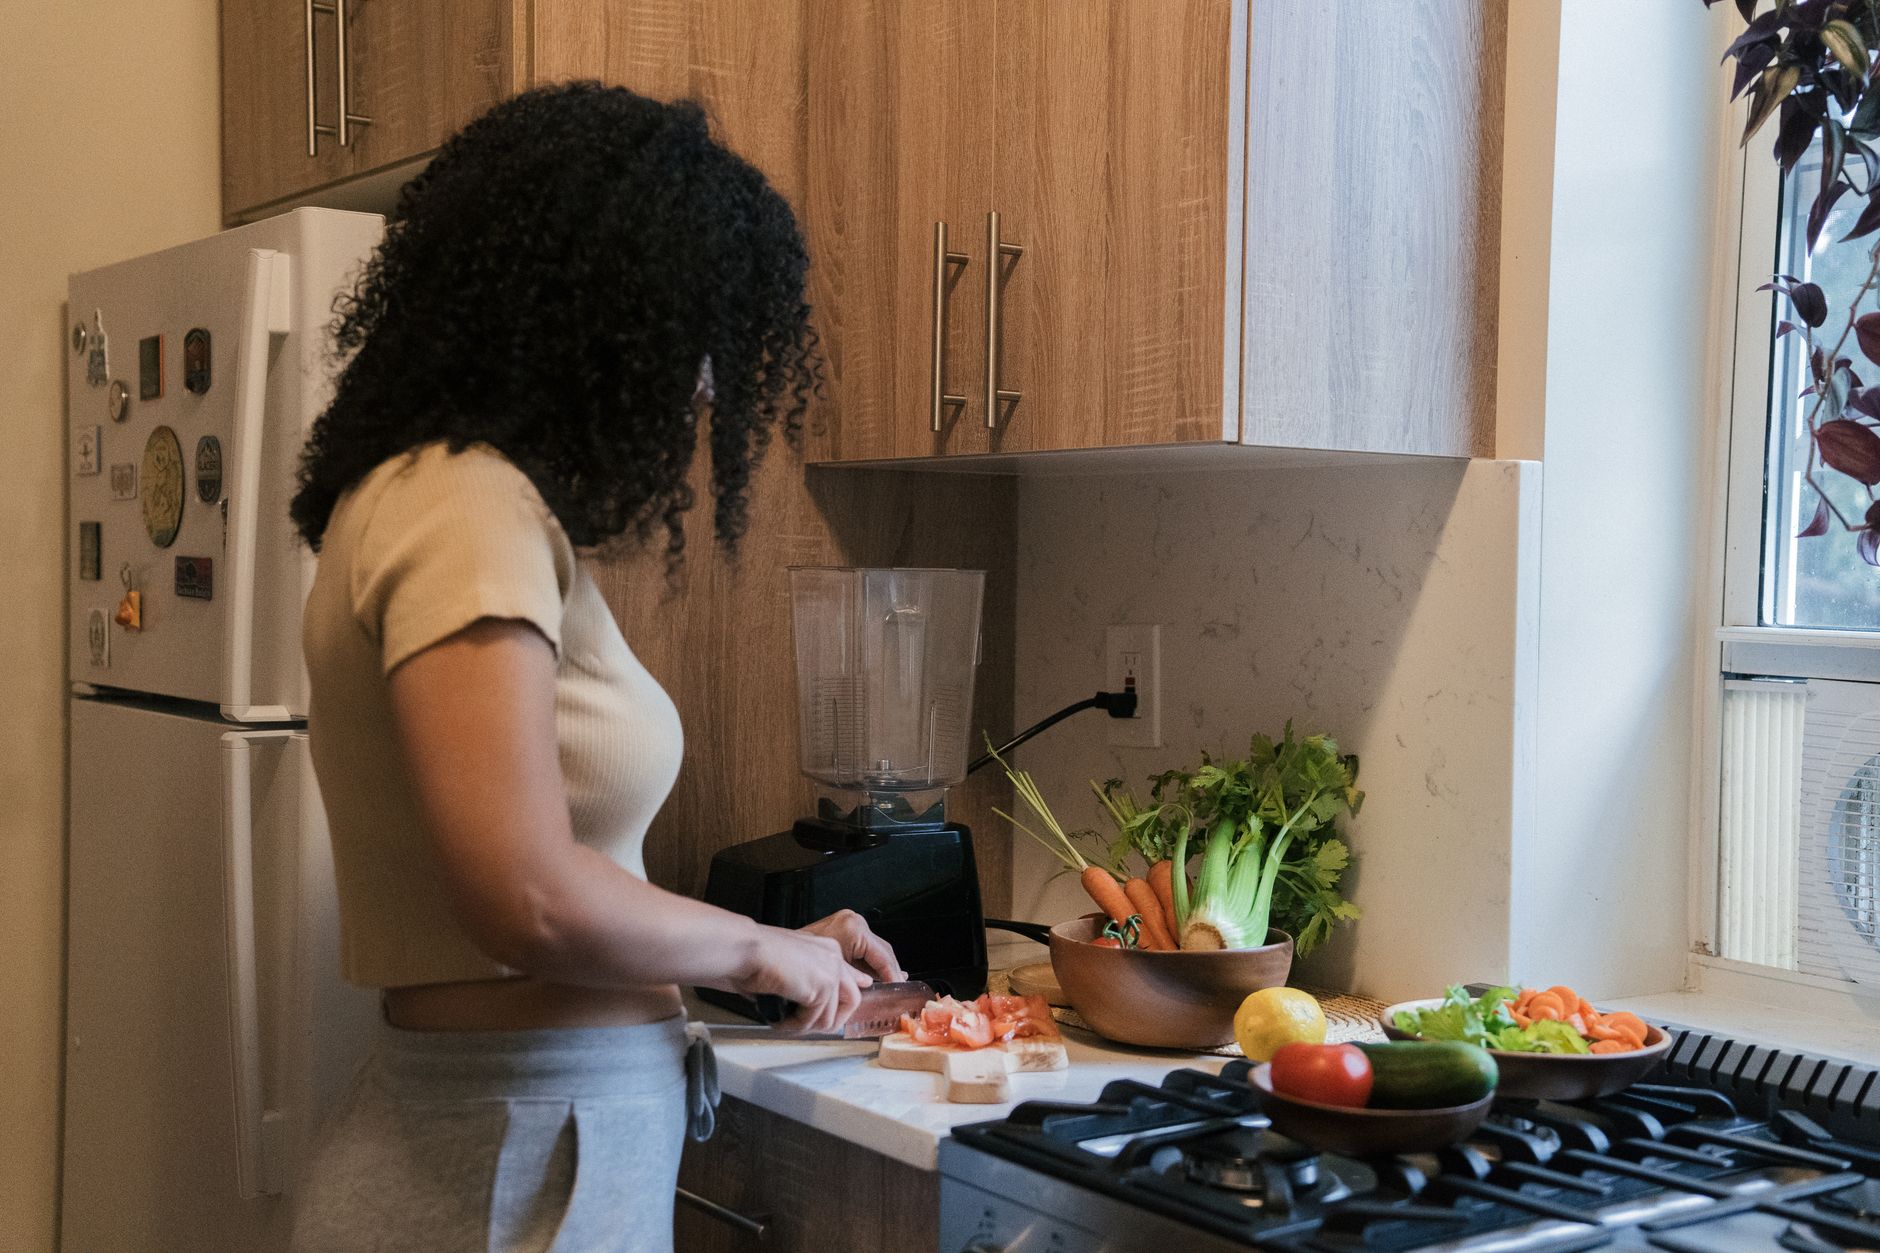
    Setting up a roommate-friendly fridge labeling system to cut food waste while prepping dinner.
    Label as you prep: 5 seconds now saves a meal later. Photo: Mike Jones / Pexels

    Your 30-minute setup sprint for a roommate fridge labeling system

    1. Empty and wipe the middle shelf. Place the β€œEat Me First” bin front and center.
    2. Place personal bins on the top shelf. Add names.
    3. Print or write the color legend and rules card; stick them on the door.
    4. Put dots + marker in a magnetic caddy at eye level.
    5. Label three items right now to seed the habit.
    6. Schedule Sunday 8:00 p.m. as your weekly 10-minute reset.

    In two weeks you should notice easier meal decisions, fewer mystery containers, and a lighter trash day. That’s enough to run a roommate-friendly fridge labeling system to cut food waste without micromanaging anyone.

    Next steps to keep your shared fridge labeling to reduce waste

    • Fridge selfie: Snap the zones and legend. Pin the photo in your roommate chat.
    • Two-use-up rule: Every week, each person claims two items from β€œEat Me First.”
    • Monthly tweak: In five minutes, adjust the legend or bin sizes based on what you actually buy and cook.

    Track one simple metricβ€”β€œitems saved from the bin this week”—and celebrate small wins. As a result, shared kitchens using a roommate-friendly fridge labeling system to cut food waste keep improving with almost no extra effort.

    Helpful sources

    Keep the system kind and simple. That’s what makes a roommate-friendly fridge labeling system to cut food waste work for real people, in real apartments, for the long run.


  • Fridge Declutter Checklist Organized by Food Safety Priority

    Fridge Declutter Checklist Organized by Food Safety Priority

    This fridge declutter checklist by food safety priority helps you act fast, avoid cross-contamination, and cut waste without guesswork. You will triage the riskiest foods first, reset easy Ò€œbefore/afterÒ€ zones, and follow a simple reminder cadence so your fridge stays clear week after week.

    Because food safety comes first, keep your refrigerator at 40°F (4°C) or below and your freezer at 0°F (-18°C). That target slows bacterial growth and keeps ready-to-eat foods safer for longer. According to the USDA and CDC, holding foods at the right temperature and storing high-risk items in the right zones are two of the biggest wins you can make today.

    If your fridge tends to become a holding zone for half-used sauces, mystery leftovers, and grocery-day overflow, this guide gives you a repeatable system instead of another one-time cleanout. The goal is not a photo-ready refrigerator. The goal is a calmer kitchen, safer food, and fewer open mental loops every time you reach for breakfast or lunch.

    Key takeaways at a glance

    • Start with the highest risk foods: leftovers, deli meats, cut produce, and raw meat/seafood.
    • Top and middle shelves are for ready-to-eat foods. Bottom shelf is the safe landing zone for raw meat and seafood.
    • Door is warmest. Keep condiments there, not milk or eggs.
    • Label, date, and use a weekly sweep to prevent science projects.
    • Set a 15-minute timer. Small, steady resets beat marathon cleanups.

    Fridge Declutter Checklist by Food Safety Priority: Quick start

    Keep this fridge declutter checklist by food safety priority handy as you work. Also, set a 15-minute timer so the task stays quick and focused.

    • Wash hands. Empty the trash and clear counter space.
    • Check a fridge thermometer. Aim for 40°F (4°C) or below.
    • First pass (Tier 1, ready-to-eat): leftovers, deli meats, cut fruit/veg, soft cheeses. Toss expired, sniffy, or unknown items.
    • Next pass (Tier 2, raw proteins): raw meat, poultry, seafood. Look for leaks, repackage on a tray, and move to the bottom shelf.
    • Then (Tier 3, dairy and prepared sauces, eggs in carton): check dates and quality.
    • After that (Tier 4, whole produce): remove slimy leaves, add paper-towel liners, sort by humidity drawer.
    • Door sweep: condiments only. Group like-with-like and date lids if you often forget open dates.
    • Wipe shelves and gaskets quickly as you go.
    • Set Ò€œafterÒ€ zones: top = ready-to-eat, middle = dairy/leftovers, bottom = raw proteins, drawers = produce, door = condiments.
    • Label one bin Ò€œEat First.Ò€ Park all quick-to-spoil items there.

    Why a fridge declutter checklist by food safety priority works

    Different foods carry different risks and storage limits. Ready-to-eat foods (like deli meat or leftovers) can grow Listeria in the fridge if kept too long. Raw meat and seafood can drip and contaminate foods below. Therefore, a safety-first order reduces both illness risk and cleanup time. It also makes weekly upkeep simple because you always check the same tiers in the same order. This fridge declutter checklist by food safety priority keeps the highest risk items visible and contained.

    For temperature and storage basics, see the USDA on refrigeration safety, the FDA on storing foods safely, and the CDCÒ€ℒs core Ò€œclean, separate, cook, chillÒ€ guidance. These core rules power the simple system below.

    What to check first in a refrigerator declutter checklist by safety priority

    Start with what can make you sick fastest or spoil the soonest. Then move to lower-risk categories. This order keeps you decisive and protects the rest of your food.

    Safety priority tiers for a fast triage
    Tier Category Examples What to do
    1 (Highest RTE risk) Ready-to-eat, quick spoilage Leftovers, deli meats, cut fruit/veg, soft cheeses Toss unknowns. Date and label keepers. Place on top/middle shelves.
    2 (Cross-contam risk) Raw meat, poultry, seafood Chicken, ground beef, fish, shellfish Contain leaks on a tray. Store on bottom shelf. Cook soon or freeze.
    3 Dairy and eggs (in carton) Milk, yogurt, hard cheeses, eggs Check dates and smell. Keep on middle/back shelves, not the door.
    4 Whole produce Leafy greens, berries, apples, carrots Use crisper drawers. Separate ethylene-sensitive items. Add liners.
    5 (Warmest area) Condiments and stable sauces Mustard, ketchup, pickles, hot sauce Door shelves only. Group and rotate. Date lids if you often forget.

    Fridge declutter checklist by food safety priority: before-and-after zones

    Instead of memorizing rules, map your shelves once. Then keep the same map every week. The Ò€œafterÒ€ layout below follows temperature gradients and drip risks.

    • Before: milk in the door, raw chicken on the middle shelf, leftovers under meat trays.
    • After: milk on a back shelf, raw meat on the bottom over a tray, leftovers and deli on the top or middle shelves, condiments in the door.

    Refrigerator declutter checklist by safety priority: where foods live

    Zones do the heavy lifting. As a result, you store items by risk and by temperature stability. Here is a simple map you can follow today.

    Zone map that matches temperature and drip risk
    Zone Best for Why it works Examples
    Top shelf Ready-to-eat foods Coldest stable air; no raw drips above Leftovers, cooked grains, deli meat, hummus
    Middle shelf Dairy and ready-to-eat Stable temp for milk/yogurt; easy to see Milk, yogurt, hard cheese, meal-prepped boxes
    Bottom shelf Raw proteins Prevents drips onto other foods Chicken, ground beef, fish (on a tray)
    Crisper drawers Produce by humidity Controls moisture to extend freshness Leafy greens (high humidity), apples (low)
    Door Condiments and stable sauces Warmest area; not for milk or eggs Pickles, mustard, hot sauce
    Sink-side cleanup step that helps a fridge declutter checklist by food safety priority work after dinner.
    Quick cleanup and container prep make leftovers easier to date and store. Photo by Sardwim via Pexels.

    Pro tip: Keep a shallow Ò€œEat FirstÒ€ bin on the top shelf. Also, set a weekly alarm to check it before planning meals.

    Step-by-step: Printable fridge declutter checklist by food safety priority

    Print these steps or save them as a phone note. Therefore you can run the same routine in less time every week.

    1. Wash hands and set a 15-minute timer.
    2. Verify temperature: fridge at 40°F (4°C) or below.
    3. High-risk sweep (Tier 1): leftovers, deli meats, cut produce, soft cheeses. Toss if doubtful.
    4. Raw proteins next (Tier 2): repackage leaks and move to the bottom shelf.
    5. Dairy and eggs (Tier 3): check dates and smell. Rotate forward.
    6. Whole produce (Tier 4): remove wilted bits. Dry greens and add liners.
    7. Door check: group condiments. Date lids. Remove near-duplicates.
    8. Wipe shelves and drawers. Clean gaskets.
    9. Reset zones: top = ready-to-eat; middle = dairy/leftovers; bottom = raw proteins; drawers = produce; door = condiments.
    10. Label and date. Use Ò€œEat FirstÒ€ and Ò€œThaw HereÒ€ bins.
    Print-friendly checklist you can check off weekly
    Task Done
    Wash hands. Set 15-min timer. [ ]
    Verify 40°F (4°C) or below. [ ]
    High-risk sweep (Tier 1): toss unknowns. [ ]
    Raw proteins contained (Tier 2) on bottom shelf. [ ]
    Dairy and eggs rotated (Tier 3). [ ]
    Produce refreshed (Tier 4) and drawers lined. [ ]
    Door: condiments reviewed and grouped. [ ]
    Wipe shelves/gaskets. [ ]
    Reset zones and label bins. [ ]

    How often should you run the fridge declutter checklist by food safety priority?

    Run a quick sweep weekly. Also, add a deeper monthly reset and a seasonal clean. The cadence below keeps your fridge safe and easy without turning it into a project.

    Reminder cadence that maintains safety and flow
    Frequency Focus Time
    Weekly (15Γ’β‚¬β€œ20 min) Tiered sweep, wipe spills, rotate, refresh Ò€œEat FirstÒ€ bin Short and steady
    Monthly (30Γ’β‚¬β€œ40 min) Deep clean drawers and shelves, check gaskets, wash bins More thorough
    Seasonal (45Γ’β‚¬β€œ60 min) Defrost if needed, vacuum coils, full inventory and reset labels Performance boost

    Tools and temps for a fridge declutter checklist by food safety priority

    Keep the fridge at 40°F (4°C) or below and the freezer at 0°F (-18°C). Also, place an inexpensive fridge thermometer on a middle shelf so you can spot swings. Therefore, when the door is opened often, you still keep a stable average. Use a shallow tray under raw proteins, paper-towel liners in drawers, and a bold Ò€œEat FirstÒ€ label on a top-shelf bin. As part of your fridge declutter checklist by food safety priority, keep milk off the door and keep raw proteins contained.

    Raw meat placement in a fridge cleanout checklist by safety risk

    Place raw meat, poultry, and seafood on the bottom shelf in a leak-proof container or tray. As a result, you prevent drips onto ready-to-eat foods. If you buy family packs, divide them into meal-size portions and freeze what you will not cook within a day or two.

    Date labeling step for leftovers in a fridge declutter checklist by food safety priority.
    Dating containers turns a quick fridge reset into a repeatable system. Photo by Jakub Zerdzicki via Pexels.

    Labeling, bins, and zones for a fridge declutter checklist by food safety priority

    • Label bins by function: Eat First, Thaw Here, Lunch Fixings, KidsÒ€ℒ Snacks.
    • Date lids with a marker. Use Ò€œMM/DD + content.Ò€
    • Pick tray sizes that fit your bottom shelf. A rim contains leaks.
    • Use high humidity for leafy greens; low for most fruits.
    • Group condiments by use: sauces, dressings, breakfast, spicy.

    When should you freeze instead of refrigerate?

    A fridge declutter checklist by food safety priority works even better when you decide quickly what should leave the fridge entirely. Freezing buys time, protects quality on items you cannot use soon, and prevents the Ò€œI meant to cook that yesterdayÒ€ cycle that leads to waste.

    Use the freezer when the fridge timeline is too short
    Item Refrigerate when Freeze when
    Raw chicken, beef, seafood You plan to cook it within 1-2 days Dinner plans changed or you bought extra
    Cooked leftovers You will eat them within 3-4 days You already know this week is full
    Bread, tortillas, buns You will finish them this week You only need a few portions at a time
    Shredded cheese or cooked grains You meal prep often You buy warehouse-size bags or bulk cook

    Label freezer items clearly so they do not vanish into long-term storage. A simple Ò€œfreeze byÒ€ decision during your weekly sweep cuts clutter faster than reorganizing the same shelf three times.

    Door storage myths in a fridge declutter checklist by food safety priority

    • Milk and eggs: keep them on a back shelf, not the door. The door is the warmest zone because it opens.
    • Condiments: most are fine on the door after opening; check each label and Ò€œrefrigerate after openingÒ€ notes.
    • Butter: many keep a small butter dish in the door. However, for longer storage and in warm kitchens, use an interior shelf.
    • Drinks: the door is convenient for bottles and seltzers. Rotate often so older cans move forward.
    • As you apply your fridge declutter checklist by food safety priority, move any high-risk foods off the door first.

    Leftovers rotation plan you will use

    Keep leftovers safe and visible so they get eaten on time. Tie this plan to your fridge declutter checklist by food safety priority and you will cut waste fast.

    • Use clear, shallow containers so food cools faster and stacks well.
    • Label with date and dish name. Add Ò€œEat byÒ€ if it helps you act.
    • Adopt FIFO: First In, First Out. Place newest items behind older ones.
    • Stage leftovers on the top or middle shelf so they are eye level.
    • During the weekly sweep, move anything due soon into the Ò€œEat FirstÒ€ bin.

    Grocery day mini-reset: 8-minute method

    Before you unload, do a fast pass so you do not stack new food on top of old. In fact, running the fridge declutter checklist by food safety priority right before unpacking keeps your zones honest.

    1. Quick toss anything expired or unknown.
    2. Slide raw proteins to the bottom tray space you kept clear.
    3. Rotate older milk/yogurt to the front; stage new behind.
    4. Refresh the Ò€œEat FirstÒ€ bin with items to use in the next two days.
    5. Wipe one shelf if you see crumbs or drips. Then load in by zone.

    How to use a fridge declutter checklist by food safety priority in a shared household

    Shared kitchens fail when the rules live in one personÒ€ℒs head. Therefore, make your fridge declutter checklist by food safety priority visible and simple enough that a partner, roommate, or older child can follow it in under a minute.

    • Give every shelf a job: top for ready-to-eat, bottom for raw proteins, door for condiments.
    • Keep one marker and one tape roll nearby so dating food is friction-free.
    • Choose two shared bins only: Eat First and Lunch Fixings. Too many labels create visual noise.
    • Agree on one default rule for unknown containers: if no one can identify it right away, it does not stay.
    • Run the weekly sweep before the main grocery trip so nobody has to rearrange crowded shelves later.

    If you live with people who snack directly from packages or forget leftovers, put the most perishable ready-to-eat foods at eye level. Visibility often solves more waste than another lecture about food safety.

    Small fridge and dorm adjustments

    • Use two slim bins instead of one big tray for raw proteins; they fit narrow shelves.
    • Choose half-depth organizers so you can still see the back.
    • Run shorter, twice-weekly sweeps; small fridges warm faster when opened.
    • Skip bulky packaging. Decant into stackable, leak-resistant containers.
    • Post the fridge declutter checklist by food safety priority on the inside wall for a fast visual cue.

    Household rules that keep systems going

    • One label style only. Keep a marker and tape near the fridge so dating takes seconds.
    • Ò€œIf it drips, it goes low.Ò€ Everyone follows this rule, every time.
    • Use simple color hints: red dot for raw proteins, green for produce, blue for ready-to-eat.
    • After cooking, plate one extra meal into a labeled container for tomorrowÒ€ℒs lunch.
    • Assign a weekly sweep owner, then rotate. Keep it to 15 minutes.

    Troubleshooting smells and temperature swings

    • Persistent odor? Remove items, wash shelves and bins with mild soap, then place an open box of baking soda to absorb smells.
    • Condensation or frost? Check gaskets for gaps and avoid overfilling so air can circulate.
    • Warm spots? Verify the thermometer on a middle shelf. Do not block vents with containers or bags.
    • Leaky packs? Use a rimmed tray and discard any food that was exposed to raw drips.
    • Frequent door opening? Group snacks together and keep them visible to shorten open time.

    How this fridge checklist fits a calmer weekly reset

    The best home systems reduce decision fatigue across the whole week, not just in one appliance. That is why this fridge declutter checklist by food safety priority works well as part of a broader reset rhythm: five minutes to review leftovers, five minutes to stage the next meals, and five minutes to wipe the highest-use shelf.

    If you want a bigger routine around food, paperwork, and work blocks, pair this habit with The Work-Life Reset Workbook. If your bigger challenge is protecting attention long enough to keep small systems going, Focus Recharged is a practical next read. The same principle applies in every room: fewer decisions, clearer zones, and repeatable cues.

    More calm systems for busy weeks

    Once your fridge is easier to manage, connect it to one or two other low-friction systems instead of starting a giant organizing project. The paper clutter triage system for a calmer home office pairs well with grocery-day planning because both use quick sorting rules. If you want a broader reading list of routines, planning tools, and habit guides, browse the Mind Clarity Hub books hub or scan the reviews hub for tools that support your weekly reset.

    Food waste micro-tracker

    A tiny log makes choices easier. Track opened and cooked dates where you see them. Tie this to the fridge declutter checklist by food safety priority so the habit sticks.

    Simple fridge waste and use-by tracker
    Item Opened/Cooked Eat By Status
    [ ] [ ] [ ] [Use / Freeze / Toss]
    [ ] [ ] [ ] [Use / Freeze / Toss]
    [ ] [ ] [ ] [Use / Freeze / Toss]

    Common mistakes to avoid

    • Storing milk or eggs in the door where it is warmest.
    • Putting raw chicken above salad fixings.
    • Keeping leftovers without a date label.
    • Washing berries then storing them wet. Rinse right before eating, or dry very well first.
    • Ignoring your thermometer. Adjust temperature if it drifts above 40°F (4°C).

    Trusted references for safe storage and times

    FAQ: fridge declutter checklist by food safety priority

    How long can I keep leftovers?

    Most cooked leftovers last 3Γ’β‚¬β€œ4 days in the fridge at 40°F (4°C) or below. Label the date and store them on a top or middle shelf so you see them. When in doubt, throw it out. For common times, check the FoodSafety.gov cold storage charts.

    Are the door shelves safe for milk and eggs?

    No. The door is the warmest zone because it swings open. Keep milk and eggs on a colder shelf near the back. Use the door for condiments and stable sauces.

    Should I wash produce before storing it?

    Rinse produce under running water right before you eat or cook it. If you pre-wash for meal prep, dry it very well before storing in clean containers lined with paper towels to limit moisture. The goal is to prevent extra humidity that speeds spoilage.

    What if the power goes out?

    Keep the fridge door closed. Food stays safe about 4 hours in a closed fridge. If foods are above 40°F (4°C) for more than 2 hours, many perishable items should be discarded. When power returns, check a thermometer and follow USDA guidance on what to toss.

    Can raw meat go above produce if it is sealed?

    Do not store raw meat above produce. Even sealed packs can leak. Keep raw proteins on the bottom shelf in a bin or tray. That setup protects foods below.

    How can I keep the system going?

    Run your weekly sweep, keep an Ò€œEat FirstÒ€ bin, and reset zones after every grocery run. Also, place a small marker and labels in a magnetic cup on the fridge side so dating takes seconds.


    Finally, keep your momentum with one simple rule: if it drips, it lives on the bottom; if it is ready-to-eat, it lives high and visible. Use this fridge declutter checklist by food safety priority each week, and your fridge will stay clear, safer, and easier to use.

    EditorÒ€ℒs note: Guidance reflects widely accepted food safety basics. Always follow local regulations and manufacturer instructions for your specific appliance. Last reviewed: May 2026.

    Next step: build calmer home routines with short, automatic checklists. Start with the Books hub, use The Work-Life Reset Workbook for your weekly rhythm, and skim the Reviews hub when you want practical tools that support the system.

    Helpful resources for your next step

    Affiliate disclosure: As an Amazon Associate, Mind Clarity Hub may earn from qualifying purchases at no extra cost to you. Use this link only if it genuinely helps your planning.

    If Fridge Declutter Checklist Organized by Food Safety Priority is a routine you want to keep using, a simple workbook, planner, or desk tool can make the steps easier to repeat.

    Compare related planners, workbooks, and organization tools on Amazon.