...

Tag: para method

  • How to Organize Digital Notes Without Building a Complicated System

    How to Organize Digital Notes Without Building a Complicated System

    If you’ve ever wondered how to organize digital notes without building a maze of folders, you’re in the right place. This guide shows a small, durable setup that works in almost any app. It relies on one inbox, four top-level buckets, a clear naming rule, a short weekly review, and two or three saved searches. You will be able to capture fast and find things laterβ€”without learning a complex system.

    How to organize digital notes: quick start

    This 10-minute plan shows how to organize digital notes without overthinking. Start here:

    • Create one capture inbox for everything.
    • Set four top-level buckets: Projects, Areas, Resources, Archive.
    • Name notes with a simple, consistent pattern.
    • Tag lightly (3–7 tags total), only when it helps search.
    • Process your inbox weekly in 15–20 minutes.
    • Use two or three saved searches or smart folders to surface what matters.
    • Automate one capture path (email-to-notes or web clipper).

    Three principles tie this together: a small set of rules is enough for how to organize digital notes; folders give you a spine while tags and search do the fine work; and saved searches beat deep hierarchies when you need speed.

    Why this works: Research on cognitive offloading shows that moving details out of your head reduces mental load and improves performance. You just need light structure, not a perfect taxonomy. See the review by Risko & Gilbert for a clear summary of how external notes support memory and planning (Risko & Gilbert, 2016).

    how to organize digital notes with simple sticky-note tags on a laptop
    Sticky-note style tags can inspire simple digital tags. Photo by kaboompics.com via Pexels.

    Source: Pexels

    Organize digital notes in 7 steps (minimum-viable system)

    Before you learn how to organize digital notes, set one single capture point. Then add a clear but shallow structure. Keep it the same across devices. The goal is frictionless capture and fast retrieval, not elegance.

    Step 1: Create one inbox for organizing digital notes

    Put everything you captureβ€”ideas, links, quotes, tasksβ€”into a single default notebook or folder called β€œInbox.” Make this the default on phone, tablet, and laptop so notes land in the same place. No choices at capture time means no friction and fewer lost thoughts.

    On mobile, add a home-screen shortcut that opens a blank note in Inbox. Turn on any email‑to‑notes address your app offers and forward low‑value messages there. Finally, install the web clipper so articles and receipts land in Inbox by default.

    Reduce capture friction further by keeping titles short at first. A fast β€œIdea β€” keyword” is enough. During your weekly review you can expand titles and sort items to the right bucket. The point of the inbox is to be a funnel, not a filing cabinet.

    Step 2: Use four buckets to organize digital notes

    Set up four top-level folders or notebooks: Projects, Areas, Resources, Archive. This mirrors the well-known PARA pattern and works in any tool (Forte Labs).

    • Projects: Short-term efforts with a clear outcome (e.g., β€œPlan Q4 offsite”).
    • Areas: Ongoing responsibilities without an end date (e.g., β€œFinances,” β€œHealth”).
    • Resources: Useful references you may need later (e.g., β€œWriting,” β€œHome maintenance”).
    • Archive: Inactive or finished items from any of the above.

    Use this as a shallow spine. Do not add subfolders until a folder has more than ~50 notes and you truly need a split.

    When in doubt, file to Projects or Areas first. Those two buckets map to what is moving now (Projects) and what you’re responsible for over time (Areas). Resources are for background material and inspiration that does not demand action. Archive is a relief valveβ€”send finished project notes there so your active views stay lean.

    Step 3: Naming rules for digital note organization

    Names matter more than tags. A good rule puts time and topic first so your list scans well. Here is a simple pattern:

    Pattern Example Why it helps
    YYYY-MM-DD – Title β€” Keywords 2026-07-10 – Sprint review β€” action items Sorts by date and reads clearly.
    ProjectCode – Title β€” YYYY-MM Q4Offsite – Venue shortlist β€” 2026-07 Groups project notes together.
    Area – Title β€” Verb Finances – Budget notes β€” adjust Signals purpose at a glance.

    Keep punctuation simple (dash or em dash) and avoid long strings. A clear date-prefix is one of the easiest ways for how to organize digital notes consistently.

    Make your titles searchable. Include names, places, or verbs you would actually type later. Avoid β€œMisc,” β€œStuff,” or vague labels. If two notes have similar titles, add a date, a person, or a short qualifier to separate them.

    Templates help. For recurring note typesβ€”like 1:1s or meetingsβ€”start with a title stub you reuse every time. Consistency turns your titles into an index you can trust.

    Step 4: Tags that help digital note organization

    Tags should be few, stable, and generic. Too many tags slow you down. Start with 3–7 tags such as #todo, #idea, #meeting, #reference, #waiting. Add a tag only if it helps you re-find the note later.

    Prefer lowercase, one-word tags you can remember. Don’t mirror your folder names as tagsβ€”folders are the spine while tags are cross-cuts. If your app lacks statuses, a small workflow set like #next and #waiting can stand in without bloat.

    When a tag stops earning its keepβ€”meaning you rarely use or search for itβ€”merge or delete it. Trimming keeps your tag set learnable.

    Step 5: Weekly review to organize digital notes

    Book a 15–20 minute slot each week. Move each Inbox item to Projects, Areas, or Resources; rename it; and add a tag only if helpful. Archive what’s done. Set reminders for time-bound notes in your calendar or task app.

    A simple cadence works well: minutes 0–5 to clear obvious junk and rename quick wins; minutes 5–12 to file the rest into Projects, Areas, or Resources; minutes 12–20 to scan your β€œNext actions” smart folder and nudge two items forward. The same routine, every week, is what builds trust.

    Set a time to practice how to organize digital notes each week. It builds trust in your system.

    Step 6: Smart searches for organizing digital notes

    Search is powerful. In fact, research from Microsoft suggests search is central in personal information management, often beating complex filing (Microsoft Research). Use saved searches or smart folders to surface what you need:

    • Active this month: notes updated in the last 30 days.
    • Next actions: notes tagged #todo or containing verbs like β€œcall,” β€œsend,” β€œdraft.”
    • Meetings: notes with #meeting or titles starting with a date.

    Examples: Apple Notes smart folders can include notes with a specific tag and a date range; Evernote saved searches support updated:day-30 and tag:todo; Obsidian searches can look like path:Projects updated:month with a community plugin. Start with one or two saved views you’ll check daily.

    Smart folders are the secret in how to organize digital notes you actually find later.

    Step 7: One automation for digital note organization

    Keep it simple. Automate only the highest-friction capture path.

    • Email β†’ Notes: Forward receipts or confirmations to Inbox.
    • Web clipper: Save articles to Resources with a standard template.
    • Template: Pre-fill β€œMeeting” notes with date, attendees, and bullets.

    Favor built-in automations firstβ€”they are easier to maintain than third-party chains. Name your rules in plain language (for example, β€œReceipts β†’ Inbox”) so you remember why they exist during quarterly cleanup.

    Folders vs tags for digital note organization

    Short answer: Use both. Let folders be your spine. Let tags and search do the fine work. When you plan how to organize digital notes, think of folders as containers for meaning and tags as spray paint to mark cross-cutting themes.

    Use this when… Choose folders Choose tags
    You want a simple place to put things Yes No
    You need cross-topic views (e.g., all meetings) No Yes
    You collaborate and others expect a structure Yes Maybe
    You re-find by search terms more than browsing Maybe Yes
    You hate moving items around No Yes

    Studies in personal information management show most people still prefer folders for storing and retrieving items, even when tags exist (Bergman et al., 2013). But modern search is strong, and saved searches can remove the need for deep hierarchies (Microsoft Research).

    As a rule of thumb, start with one level of folders (your four buckets) and let saved searches give you dynamic views across them. This hybrid keeps your system understandable to collaborators and your future self.

    Note naming for digital note organization

    Names should scan well and sort well. Use dates, short titles, and a few consistent keywords. Keep verbs up front for action. Avoid vague names like β€œIdeas” or β€œMisc.” Here is a quick cheat sheet you can copy:

    Type Good name Poor name
    Meeting 2026-07-10 – Client sync β€” decisions Client meeting
    Article notes Read – Shallow work traps β€” quotes Notes from reading
    Idea Idea – Habit cue stack β€” prototype New idea
    Task note Send – Q3 goals draft β€” to Sam Goals

    Because naming drives re-finding, keep words you would actually search for in the title. A clear name is a built-in reminder.

    If you collaborate, align on one title pattern and share two examples per note type. Consistent titles make shared smart searches far more useful.

    How often to review when you organize digital notes

    Once per week is enough for most people. That cadence keeps Inbox small, files new notes where they belong, and updates smart folders. During your review, empty Inbox by moving and renaming what matters, archive stale notes older than 90 days, scan your β€œNext actions” view and move two items forward, and capture highlights from the weekβ€”wins, ideas, issues. You will trust your system more each week you follow the same flow.

    Set up digital note organization in your favorite app

    No matter the app, the steps for how to organize digital notes stay the same. Below are app-agnostic moves and one official reference where features differ.

    Apple Notes

    Create an β€œInbox” folder and set it as the default for new notes (Settings β†’ Notes). Add four foldersβ€”Projects, Areas, Resources, Archiveβ€”and avoid deep nesting. Add tags at the bottom of a note (for example, #meeting) and use Smart Folders to auto-collect notes by tag or date (Apple Support: Tags & Smart Folders).

    Microsoft OneNote

    Create one default notebook with a section called β€œInbox.” Use sections for Projects, Areas, Resources, and Archive, and pages for individual notes. Lean on page titles for naming; OneNote search covers titles and content across notebooks, so clear titles pay off.

    Evernote

    Set β€œInbox” as the default notebook (Preferences). Use notebooks or one notebook with stacks for Projects, Areas, Resources, and Archive. Tag sparingly and save searches like β€œupdated:day-30,” β€œtag:todo,” and title-based meeting queries to surface recent work.

    Obsidian

    Choose one Inbox folder as the default location in Settings β†’ Files & Links. Create top-level folders for Projects, Areas, Resources, and Archive. Rely on search and simple tags; consider a Dataview or saved search for β€œActive this month” if you use community plugins.

    Notion

    Build a β€œNotes” database with a simple template. Add properties such as Status (Inbox, Project, Area, Resource, Archive), Tags, and Updated. Create views that act like smart folders (for example, Status = Project AND Updated within 30 days) to replace deep nesting.

    Tip: Print or save this mini-map until the flow is second nature.

    What does the science say about keeping it simple?

    Two practical findings support this approach:

    1. Externalizing reduces mental load. Offloading details to notes helps you perform better on tasks and make fewer mistakes (Risko & Gilbert, 2016).
    2. People prefer folders, but search wins often. Users consistently rely on folders to store and browse, while search and saved queries help them re-find items fast (Bergman et al., 2013; Microsoft Research).

    Therefore, a shallow folder spine plus a few saved searches is a sound default for most busy adults.

    Common mistakes in digital note organization

    • Over-tagging. If you have to scroll a tag list, it’s too long.
    • Deep nesting. Three levels deep is a red flag; use search instead.
    • Renaming every week. Pick a naming pattern and stick with it.
    • Mixing tasks and notes without clarity. Give tasks a tag like #todo or send them to a task manager.
    • Skipping the weekly review. That’s where trust is built.

    When you feel friction, remove a rule rather than add one. Simpler beats perfect, because you will actually use it on your busiest days.

    Capture tips for organizing digital notes

    • Use a β€œQuick Note” or β€œNew note in Inbox” shortcut on your phone.
    • Start titles with a verb: β€œDecide”, β€œDraft”, β€œCall,” β€œCompare.”
    • Clip web pages with a standard template (Summary, Quote, Next).
    • Dictate short ideas while walking; rename them during review.

    Keep capture atomic. One idea per note makes sorting and linking easier later.

    Light automations for digital note organization

    • Auto-tag by keyword: Some apps let you add a rule to tag notes with words like β€œinvoice.”
    • Calendar links: Paste a link to the calendar event into your meeting note (or vice versa).
    • Email rules: Auto-forward receipts or statements to your notes app’s email address.

    Test each automation for a week before adding another. Less is more. Also, avoid rules that silently delete contentβ€”prefer safe defaults you can review.

    Laptop covered with colorful sticky notes for organizing ideas
    Visual cues can inspire your tag set and saved searches. Photo by DS stories via Pexels.

    Source: Pexels

    Watch: how to organize digital notes walkthrough

    If the video does not load, open it here: How to organize your digital notes to remember, connect and create with ease by Greg Wheeler.

    Collaboration patterns for digital note organization

    Keep your personal spine (Inbox + four buckets) even inside shared spaces. For shared notes, agree on a naming rule and one or two shared tags. Use shared smart views to track β€œActive this month” or β€œNext actions” across the team. Keep ownership clear so notes do not drift. When confidentiality matters, store sensitive files in the approved storage tool and link from your note rather than attaching the file.

    Keep your digital note organization flexible over time

    As buckets grow beyond a few hundred notes, split them into two broad subfolders only where the split reduces decision time. Remove or merge tags that you haven’t used in 90 days. Review smart searches each quarter and prune anything you no longer check. Finally, export critical notes quarterly as a portable backup (PDF or Markdown) so you can move tools without stress.

    FAQ on digital note organization

    Should I keep tasks in my notes?

    It depends. When tasks are small and tied to context in a note, keep them and tag #todo. For many or time-bound items, send them to a task app and link back to the note. Use one place to track deadlines.

    How many tags are too many?

    More than 7–10 tags is usually too many for a simple system. Tags should be stable and helpful. If you forget to use a tag, it is probably not worth keeping.

    Can I migrate later without losing everything?

    Yes. The structure here is app-agnostic. Folders (or notebook stacks), titles, and plain-text tags survive exports far better than complex databases. Keep a simple backbone and you can switch tools later.

    How do I handle images, PDFs, or scans?

    Store them as notes with the same naming rule. Use a keyword like β€œreceipt,” β€œscan,” or β€œdiagram” in the title. Add one tag if it improves search. If files are large, store the file in cloud storage and link it in your note.

    What if I already have 1,000 messy notes?

    Start fresh with the new spine. Leave old notes where they are. Each week, during your review, move 10–20 old notes into Projects, Areas, Resources, or Archive and rename them. In a month you will feel the difference.

    Resources to support digital note organization

    Mind Clarity Hub/Amazon Associate disclosure: Some links in this section may be affiliate links. If you buy through them, Mind Clarity Hub may earn a commission at no extra cost to you.

    Want a concise primer on building a light, flexible knowledge system? Consider Building a Second Brain (book). Use its PARA framing to label your four buckets and keep your system consistent across tools.

    Further reading on digital note organization

    Next steps to master how to organize digital notes

    Block 20 minutes to build your Inbox and four buckets. Rename your last 10 notes with the new pattern. Save two smart searches. Then schedule a weekly review. You now know how to organize digital notes with a simple, durable setup. Keep it small. Keep it steady. Your future self will thank you.


    More resources from Mind Clarity Hub

  • Second Brain Method: How to Build Your Digital Mind for Clarity & Productivity

    Second Brain Method: How to Build Your Digital Mind for Clarity & Productivity

    Feel like you’re drowning in a sea of notes, bookmarked articles, and ideas that vanish as quickly as they appear? If your digital life feels scattered across a dozen apps and notebooks, you’re not just disorganizedβ€”you’re experiencing a completely normal side effect of modern life.

    Our brains simply weren’t built to handle the constant flood of information we face every day. From a neuroscience perspective, this creates cognitive overload, jamming our limited working memory. This is where building a second brain comes in. It’s a method for externalizing your thoughts to regain focus and clarity.

    Disclosure: This article contains affiliate links. If you make a purchase through these links, we may earn a small commission at no extra cost to you. This helps support our work in creating valuable content.

    Taming Information Overload with the Second Brain Method

    The second brain method is a system for creating a trusted, external place for your ideas, notes, and resources. Think of it as an extension of your own mind. It’s designed to cut through the mental clutter. This frees up your biological brain to do what it does best: think, solve problems, and connect ideas.

    It’s not about hoarding information. Instead, it’s about building an organized, searchable knowledge base that actually serves you. This structured approach can be a powerful tool for anyone looking to achieve greater focus, as detailed in my book, The Power of Clarity.

    Second brain method shown by a man in a suit using a tablet with digital notes and a β€œSecond Brain” label floating above.

    alt=”An American man in a suit uses a tablet to interact with his digital second brain method system.”

    From a brain science perspective, this process directly counters cognitive overload. Our working memoryβ€”the mental scratchpad we use for moment-to-moment thinkingβ€”is incredibly limited. When we try to hold onto every stray thought and project detail, that workspace gets jammed. Consequently, our ability to think deeply and creatively plummets.

    If that feeling is all too familiar, you can explore our guide on what cognitive overload is and how to manage it.

    Why Our Brains Need Help: The Second Brain Method Solution

    The sheer volume of information has exploded. Until the year 1900, the sum of human knowledge was estimated to double roughly every century. Today, it doubles about every 13 months. No one can keep all of that in their head. Therefore, a system becomes a necessity, not a luxury.

    Real-World Example: Imagine a marketing manager juggling three big projects. They have client feedback buried in emails and creative sparks from a podcast. They also have market research saved as random PDFs. Without a central system, these valuable insights stay disconnected and are easily lost. This can lead to feelings of overwhelm and even contribute to burnout, a topic I cover in Burnout Interrupted. A second brain acts as a hub to connect those dots. It frees the manager from the stress of trying to remember it all. This allows them to focus on high-level strategy and execution. This is the core benefit: moving from remembering to creating.

    The Four Pillars of the Second Brain Method

    This whole system is built on four simple, repeatable steps, easily remembered by the acronym CODE:

    • Capture: Get in the habit of saving what resonates. This could be anythingβ€”quotes, meeting notes, articles, or shower thoughts. The key is to have a quick, reliable way to get it out of your head.
    • Organize: Structure that information for action, not just for storage. This is where a simple framework like PARA (Projects, Areas, Resources, Archives) shines. It helps you sort notes based on how you’ll use them.
    • Distill: Find the essence of what you’ve saved. You don’t want to re-read entire articles later. Highlight key points and summarize core insights in your own words. Your future self can then grasp the value in seconds.
    • Express: Put your knowledge to work. Use your curated insights to create something new. This could be a report, a blog post, a presentation, or a smarter solution to a problem.

    By practicing these four steps, you turn passive information consumption into an active creative process. You build a personal knowledge asset that grows more valuable over time. This helps you move toward your goals with far more clarity and a lot less stress.

    Mastering Effortless Capture with the Second Brain Method

    The whole Second Brain system hinges on one simple habit: effortless capture. If saving an idea, a link, or a thought feels like work, you just won’t do it. The goal is to make capturing feel like a reflex, not a chore.

    This starts with picking the right tools. Not the most complex ones, but the ones that are always in arm’s reach. Digital apps like Notion, Evernote, or Obsidian are popular for a reason: they sync everywhere. That means your system is ready whether you’re at your desk or waiting for a coffee.

    Real-World Example: You’re listening to a podcast while walking your dog. A brilliant idea for a work project strikes you. Instead of trying to remember it, you use a voice memo app on your phone to dictate the thought immediately. The memo saves to your digital inbox. The idea is captured safely without interrupting your walk or causing anxiety about forgetting it.

    Calming Capture Anxiety with Your Second Brain

    Have you ever had a brilliant idea pop into your head, told yourself you’d remember it later, and then felt that sinking feeling as it slipped away? Behavioral research calls the mental tax of trying to remember everything β€œcognitive load.” This constant effort can subtly increase stress and anxiety.

    Our brains are for having ideas, not for holding them. As soon as you build a capture system you actually trust, you offload that burden. You’re essentially telling your brain the idea is safe and won’t be lost. This one act can quiet a surprising amount of background mental noise, freeing you up to focus.

    A dependable system doesn’t just organize your thoughts; it calms the part of your brain that’s worried about losing them. This frees up cognitive resources for deeper, more creative thinking.

    Setting Up Your Capture Toolkit

    To make this real, you need a β€œcapture anywhere” setup. You should never have to stop and think about how to save something, only that you should.

    Here’s what a simple but powerful toolkit could look like:

    • On Your Computer: A dedicated app like Notion works great. Pair it with a web clipper extension for your browser. This lets you instantly save articles, links, and screenshots without derailing your workflow.
    • On Your Phone: Make sure your chosen app has a fast, reliable mobile version. Widgets are perfect for one-tap access to a new note. And don’t sleep on voice-to-text; it’s a game-changer for capturing ideas hands-free.
    • For Analog Ideas: Sometimes the best ideas start with pen and paper. A simple habit tracker journal on your desk is perfect for jotting down daily thoughts. You can always snap a photo of the page later and send it into your digital inbox.

    alt=”An American person at a desk quickly captures an idea for their second brain method.”

    What Should You Capture in Your Second Brain?

    The short answer is simple: anything that resonates. Don’t filter yourself. Don’t overthink it. The point of capture isn’t to build a pristine, perfectly curated library from day one. It’s about gathering the raw materials that spark your curiosity and intellect.

    Toss these kinds of things into your inbox:

    • Quotes that make you pause and think.
    • Screenshots of compelling designs or charts.
    • Links to articles or videos you want to explore later.
    • Those random shower thoughts or β€œaha!” moments.
    • Quick, actionable notes from meetings or calls.
    • Highlights and annotations from the books you’re reading. If you’re looking for a solid framework for this, check out our guide on how to take notes from a book effectively.

    Ultimately, mastering capture is about building trust. Once you truly believe that every valuable piece of information has a safe home, you give your brain permission to let go. This allows you to focus on what’s right in front of you. It’s a foundational habit that paves the way for the clarity and creative output I detail in my book, Focus Recharged.

    Organizing Your Second Brain with the PARA Method

    Just capturing ideas isn’t enough. Without a simple, intuitive way to organize everything, your second brain can quickly turn into a digital junk drawer. It becomes a place where good ideas go to be forgotten. This is where the PARA method comes in.

    Developed by Tiago Forte, PARA is a refreshingly simple system for organizing your digital information. It stands for Projects, Areas, Resources, and Archives. The genius here is that it sorts information based on how actionable it is, not by some rigid category. This tweak alone makes your notes immediately more useful.

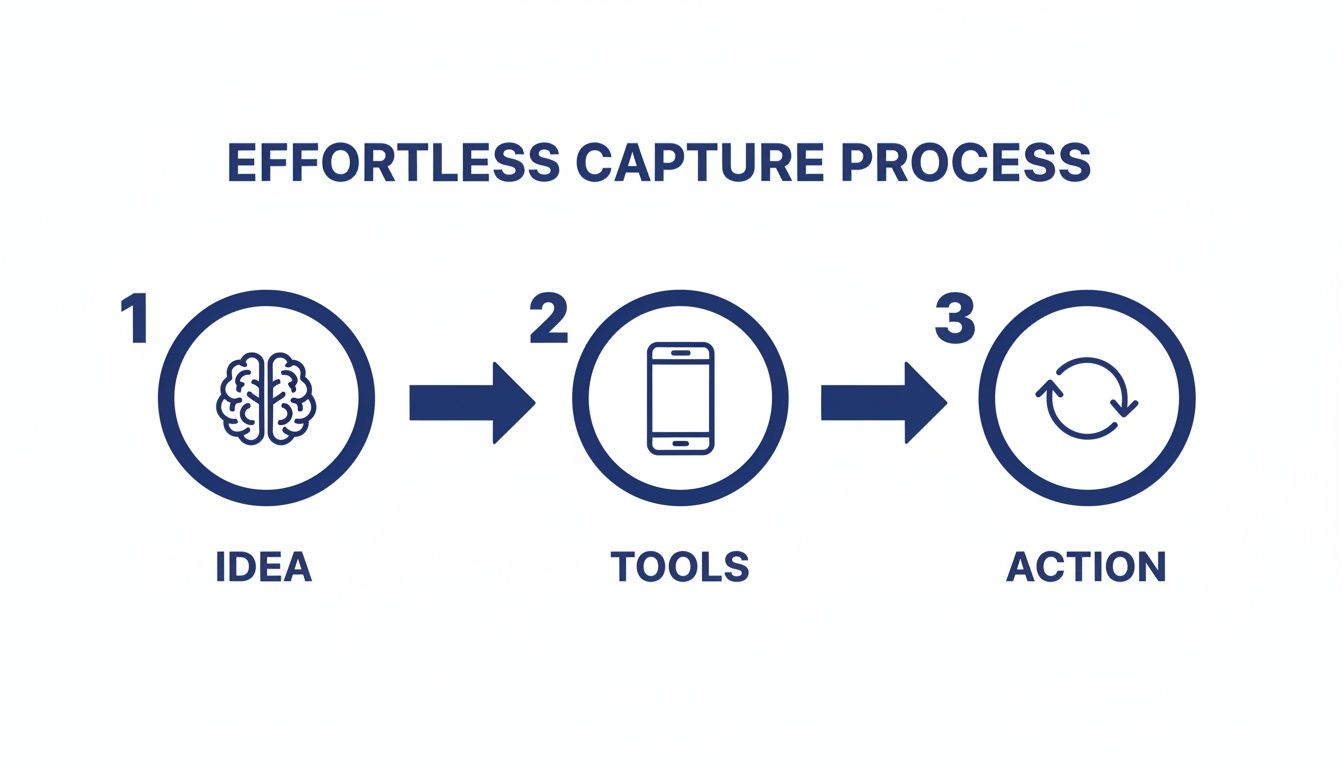
    The goal is to get thoughts out of your head and into a trusted system with as little friction as possible.

    An infographic illustrating the effortless capture process: Idea (brain), Tools (smartphone), and Action (refresh icon).

    This visual captures the core habit: moving a thought from your mind (Idea) through a device you trust (Tool) and into your system (Action). Then, it’s ready to be sorted using PARA.

    Breaking Down the PARA Categories for Your Second Brain

    Really understanding the difference between these four categories is the key to making the whole system click. It’s not about creating dozens of folders. Instead, it’s about having four main buckets that tell you where something belongs based on how you plan to use it.

    Here’s a quick breakdown to make the distinctions clear.

    Understanding The PARA Method At A Glance

    Category

    Definition

    Real-World Example

    ProjectsShort-term efforts with a specific goal and deadline.Complete website redesign, Plan family vacation, Finish online course.
    AreasLong-term responsibilities or standards you want to maintain.Finances, Health & Wellness, Professional Development, Home Management.
    ResourcesTopics of ongoing interest or themes you are researching.AI productivity, Stoic philosophy, Coffee brewing techniques, Digital marketing trends.
    ArchivesInactive items from the other three categories.Completed projects, outdated areas, resources you no longer need.

    This structure is dynamic, meaning information flows naturally between the categories. When a project is done, its folder moves to Archives. If a resource becomes critical for an ongoing responsibility, its notes might shift into an Area. This flexibility keeps your second brain from becoming stale.

    PARA in Action: A Freelance Writer’s Scenario

    Let’s make this concrete. Imagine you’re a freelance writer named Alex who wants to better manage their workflow.

    • Projects: Alex has a folder for β€œClient X Blog Post Series,” due next month. Inside are research articles, interview notes, and draft outlines. Another project is β€œUpdate Professional Portfolio,” which has a clear end date.
    • Areas: Alex maintains an β€œArea” called β€œBusiness Finances” to track invoices and expensesβ€”an ongoing responsibility. Another Area is β€œClient Relationships,” which holds notes from recurring calls and client preferences.
    • Resources: Alex is curious about productivity, so they have a β€œResource” folder named β€œAI Writing Tools.” Here, they save articles and tutorials. It’s just a topic of interest, not tied to a specific project.
    • Archives: Last year’s β€œClient Y Website Copy” project folder now lives in Archives. The project is finished, but the information is still searchable if Alex ever needs it. This system is key for creative professionals, a focus of my book The Focused Freelancer.

    By organizing this way, Alex knows exactly where to find what they need, when they need it. Active work is in Projects. Ongoing standards are in Areas. And general knowledge is in Resources. If you’re looking for more ways to structure your thoughts, you might find our guide on how to organize your thoughts for greater clarity helpful.

    Keeping Your PARA System Lean and Effective

    The most common mistake people make is over-categorizing. You really don’t need a folder for every single topic under the sun. Keep your top-level folders limited to just Projects, Areas, Resources, and Archives.

    The goal of PARA isn’t to create a perfect, museum-quality filing cabinet. It’s to reduce the friction between having a thought and knowing where to put it. Fewer choices mean faster organization and less decision fatigue, a key psychological principle for building sustainable habits.

    The widespread adoption of this system speaks volumes. Tiago Forte’s Building a Second Brain has sold over 400,000 copies worldwide. This isn’t just a fleeting trend; it shows that people are finding real, lasting value in frameworks like PARA. Exploring various efficient note taking systems can significantly boost your personal knowledge management. Ultimately, PARA helps you build a second brain that actively serves you.

    Turning Your Notes Into Actionable Insights

    So you’ve started capturing and organizing. That’s a huge first step. But a second brain filled with unread articles and raw notes is just a prettier junk drawer. It feels productive, but it doesn’t create anything on its own.

    The real magic happens when you move from passive collection to active creation. This is where the last two steps of the CODE framework, Distill and Express, come in. This is how you make your knowledge work for you.

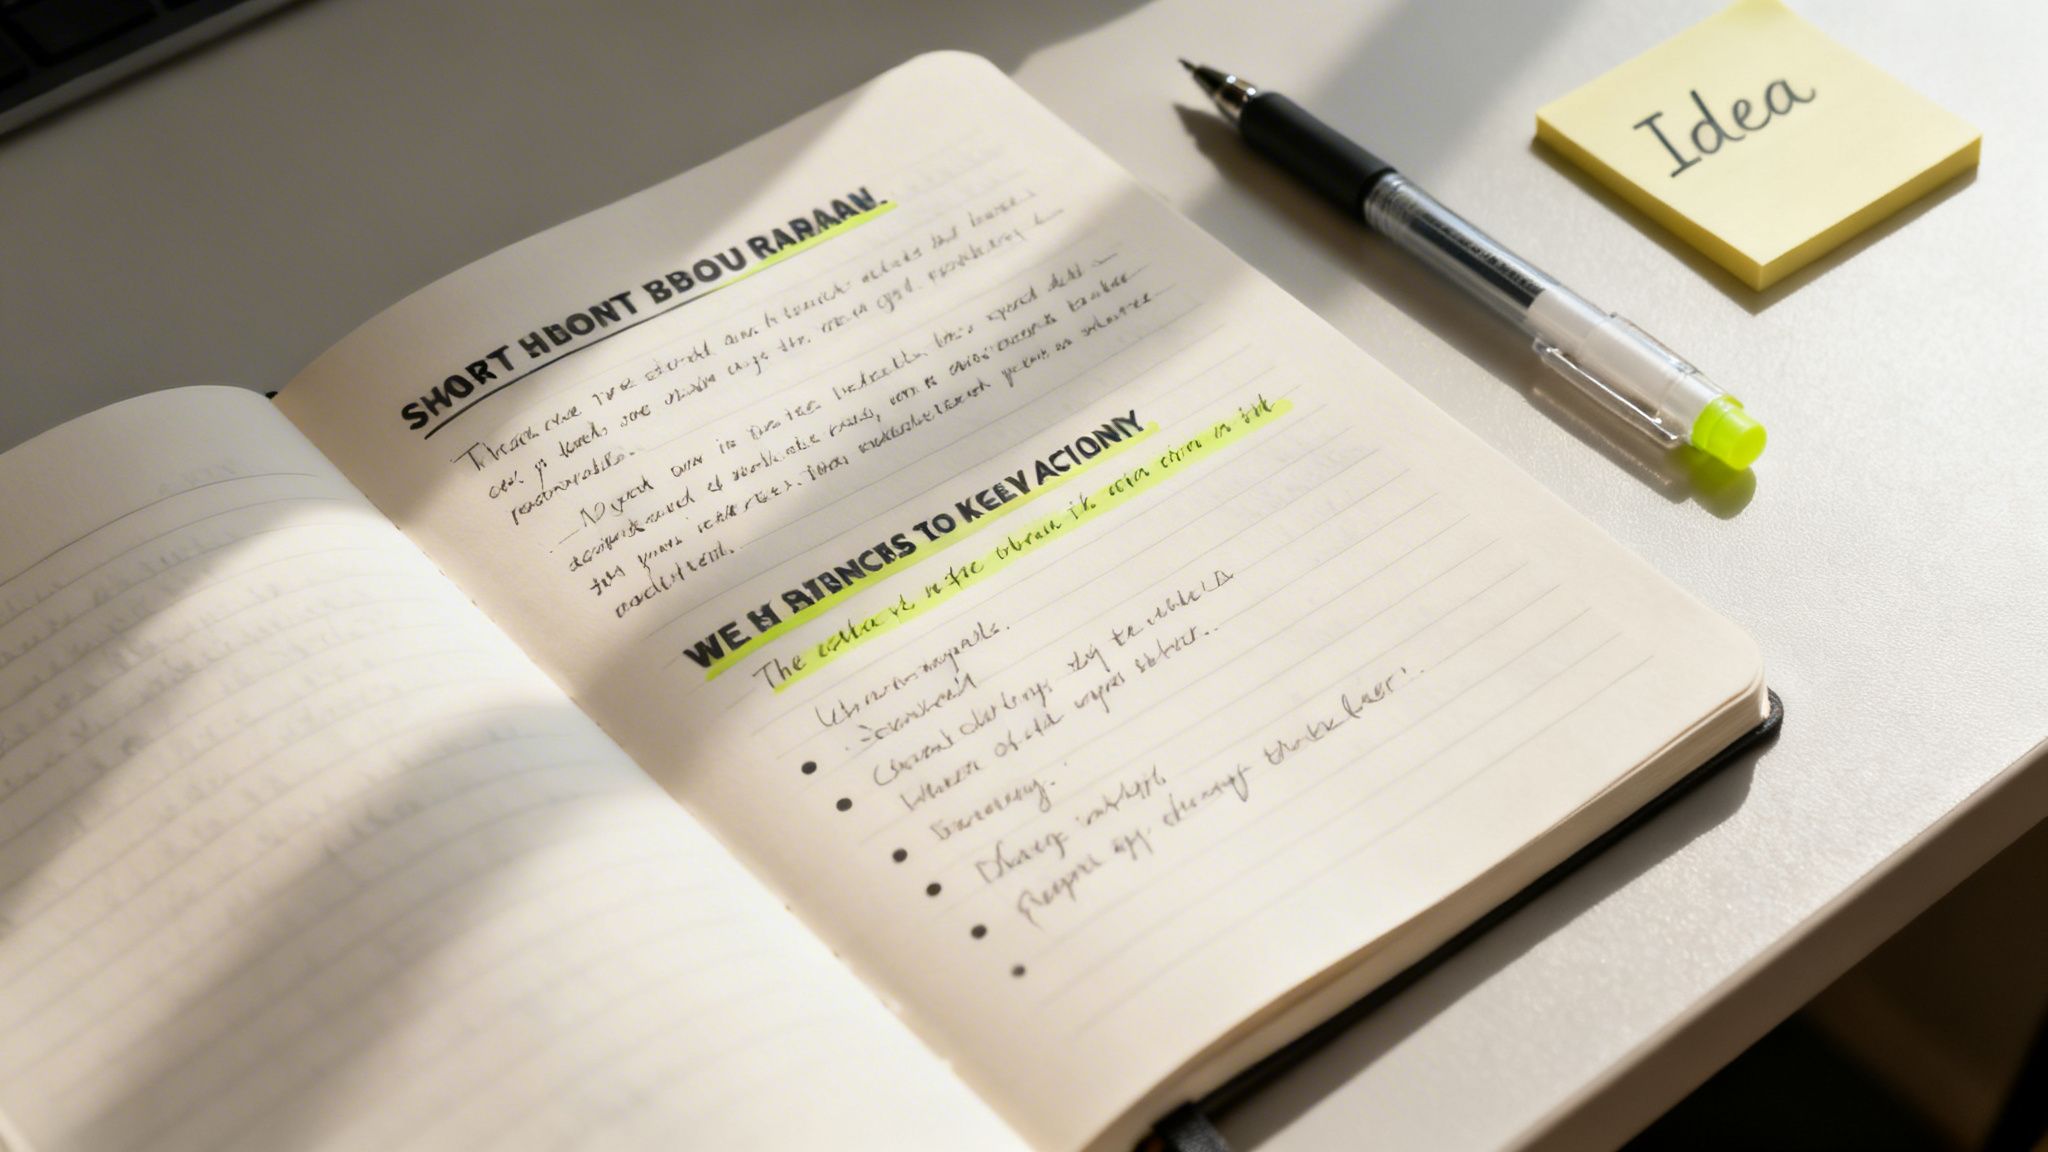
    Second brain method shown in an open notebook with handwritten notes, a pen, and a yellow β€œIdea” sticky note.

    The goal is to turn your notes into springboards for action. Don’t let them become a mausoleum of forgotten ideas.

    Finding the Essence with Progressive Summarization

    The key technique for distilling your notes is Progressive Summarization. It’s a simple, multi-layered way to make a dense wall of text instantly scannable for your future self. Instead of re-reading an entire article every time, you can grab its essence in seconds.

    The best part? It unfolds naturally over time, whenever you happen to revisit a note.

    • Layer 1: The Bold Pass. The first time you review a captured note, just bold the most interesting sentences. This first pass immediately draws your eye to what mattered most in the moment. Simple.
    • Layer 2: The Highlight Pass. Sometime later, you might open that note again. This time, read only the bolded sentences and highlight the absolute best parts among them. You’re finding the gems within the gems.
    • Layer 3: The Executive Summary. Finally, after reviewing your highlights, write a one or two-sentence summary at the top of the note in your own words. This is the ultimate distillation, the core idea you can grab and use.

    This layered approach is a gift to your future, frazzled brain. You can engage with a note at any levelβ€”glance at the summary for the gist, scan the highlights for key points, or read the bolded text for more context. It’s designed for speed.

    When you build this habit, every piece of information in your second brain becomes more valuable. If you want to go deeper on making ideas stick, our guide on how to retain what you read is a great next step.

    From Distilled Notes to Creative Expression

    With a library of distilled, summarized notes, the final stepβ€”Expressβ€”stops feeling so intimidating. You’re no longer staring at a blank page. You’re assembling pre-built intellectual legos that you’ve already polished.

    Real-World Example: Let’s say a content creator named Sarah wants to write an article on β€œAI productivity.”

    Her workflow is now completely different:

    1. Search: Sarah opens her notes app and searches for the tag β€œ#AI.”
    2. Review: In minutes, she skims the executive summaries of a dozen relevant notes she’s progressively summarized. No re-reading entire articles.
    3. Assemble: She drags the most potent highlighted quotes, bolded statistics, and her own summary insights into a new outline.
    4. Connect: Seeing all the key ideas in one place, she spots a new connection between two notes. That becomes the unique angle for her article.
    5. Create: With a rich outline full of distilled insights, writing the actual blog post becomes a much simpler task of connecting the dots.

    This process turns creation from a daunting chore into a manageable assembly project. She isn’t just regurgitating information; she’s using her curated knowledge to form new, original insights. The key to making this a real practice is scheduling it. Using a time blocking planner can help you carve out dedicated β€œcreation sessions” each week.

    Enhancing Your Second Brain Method with AI

    The classic Second Brain method gives you a rock-solid foundation for managing knowledge. However, modern technology offers a powerful way to accelerate the process. Think of artificial intelligence as an intellectual partnerβ€”a tool that helps you process, connect, and retrieve information faster than ever before.

    This isn’t about replacing your thinking. It’s about augmenting it.

    AI tools can supercharge every single step of the CODE framework. Before you even capture an article, you could ask an AI tool to generate a quick summary. This simple step helps you decide if the full text is even worth saving. This makes your capture process smarter from the very beginning.

    Real-World Example: Imagine asking your digital system, β€œWhat are the common themes between my notes on stoicism and my notes on project management?” AI-integrated note-taking apps are already making this a reality. They can scan your entire knowledge base, spot hidden connections, and suggest relationships you might have missed. This turns your Second Brain from a passive archive into an active collaborator.

    Mindful Integration of AI into Your Workflow

    As these tools become more common, it’s critical to use them mindfully. The goal is to assist your thinking, not outsource it. This means creating an environment that supports deep focus, even when you’re using AI. Something as simple as putting on a pair of noise canceling headphones can help you block out distractions. This practice of managing your environment is a key concept in my book, Digital Clarity.

    This focused approach is more important than ever. AI adoption is exploding; nearly one in five Americans now use AI daily. A staggering 75% of employed adults have used AI tools in the last six months. Knowledge workers are weaving these tools into their Second Brain workflows to speed up pattern recognition. You can learn about the state of consumer AI to see just how fast this is moving.

    Practical AI Workflows for Your Second Brain

    Getting started with AI doesn’t have to be a massive project. You can begin with a few simple, high-impact workflows that save you time and deepen your insights right away.

    Here are a few practical ways to begin:

    • Automated Tagging: Many modern apps can look at your notes and automatically suggest relevant tags. This one feature can save a surprising amount of organizational time.
    • Intelligent Search: Move beyond basic keyword searches. Start using natural language to ask your Second Brain real questions. For example, β€œShow me all notes from last year related to marketing that mention budget constraints.”
    • Content Repurposing: Feed your distilled notes on a topic to an AI. Then, ask it to generate a first draft of a blog post, a social media thread, or a presentation outline. You provide the core insights; the AI handles the initial grunt work.
    • Idea Generation: Feeling stuck? Use an AI as a brainstorming partner. Give it a few of your core ideas and prompt it to suggest alternative angles, counterarguments, or related topics you haven’t considered.

    Having a well-organized Second Brain is a massive advantage here. It provides the structured, high-quality data that AI models need to produce genuinely relevant and useful outputs. Your curated knowledge becomes the fuel for the AI engine.

    To get even more out of this, you might explore some of the best AI content creation tools that can help you process information more efficiently. If you want to go deeper on this topic, check out our guide on how to use AI for productivity.

    Editor’s Take

    The Second Brain method is genuinely transformative for knowledge workers, creators, or anyone feeling buried under information. Its real power lies in building an external system you trust. Once you stop trying to hold every idea in your head, the background hum of anxiety starts to fade. This frees up an incredible amount of mental space for the deep thinking that actually matters.

    Who is it best for? This system is ideal for people who work with ideasβ€”writers, marketers, researchers, students, and entrepreneurs. If your job involves synthesizing information to create something new, this is for you.

    What actually works? The PARA organization system is the most immediately useful part. It just makes sense. However, the true, long-term benefit comes from the consistent habit of β€œProgressive Summarization.” Distilling your notes over time is what turns your archive into a powerhouse of usable insights.

    Important Caveats: This is not a magic bullet. It requires upfront effort and the discipline to capture information consistently. If you already find complex digital tools draining, you might be better off with a simple productivity journal. Also, I recommend mastering the core habits of CODE and PARA before adding the complexity of AI tools. Get the foundation right first.

    Key Takeaways

    • Externalize Your Mind: The core idea is to offload information from your biological brain into a trusted digital system. This reduces cognitive load and frees up mental resources for creativity and problem-solving.
    • Follow the CODE Framework: Use this four-step process as your workflow: Capture what resonates, Organize for action, Distill the essence, and Express your ideas.
    • Organize for Action with PARA: Structure your digital life into four simple categories: Projects (active goals), Areas (ongoing responsibilities), Resources (topics of interest), and Archives (inactive items).
    • Distillation is Key: Use Progressive Summarization (bolding, highlighting, summarizing) to make your notes more valuable and easily scannable for your future self.
    • AI is a Supercharger, Not a Replacement: Leverage AI tools to speed up tasks like summarizing, tagging, and finding connections, but always keep your human curation and critical thinking at the center of the process.

    Disclaimer: This article contains affiliate links, which means we may earn a small commission if you make a purchase at no extra cost to you. The content provided here is for educational and informational purposes only. It is not intended as a substitute for professional medical or psychological advice, diagnosis, or treatment. Always seek the advice of your physician or other qualified health provider with any questions you may have regarding a medical or mental health condition.

    Frequently Asked Questions (FAQ)

    1. What is the best app to start a second brain?

    There’s no single β€œbest” app. The right tool is the one that feels most intuitive to you. Popular choices include Notion (for flexibility and customization), Evernote (for simple, powerful capture and search), and Obsidian (for connecting ideas through backlinks). The most important factor is choosing an app you will use consistently.

    2. How is the second brain method different from just taking notes?

    Traditional note-taking is often passive collection. The Second Brain method is an active system designed for action and creation. It emphasizes organizing notes based on their actionability (using the PARA method) and distilling them over time to make them more useful. The goal is not just to store information, but to connect ideas and produce new work.

    3. Can I use a physical notebook for my second brain?

    Absolutely. An analog system, like using a dedicated notebook or journal, is excellent for focused, distraction-free thinking. Many people use a hybrid approach: a physical notebook for brainstorming and daily notes, and a digital app for long-term storage, searchability, and storing web content. Using a great ergonomic keyboard can also make the digital part of this process much more comfortable.

    4. How long does it take to build a second brain?

    You can set up the basic structure (choosing an app and creating your four PARA folders) in less than an hour. However, building a truly valuable second brain is a continuous practice, not a one-time project. The system grows and becomes more powerful as you consistently build the habit of capturing and distilling information over weeks and months.

    5. What if I feel overwhelmed by my existing notes? Should I organize them all at once?

    No, do not try to organize everything at once. This is a common mistake that leads to burnout. Start fresh with the PARA system. Create your new folders and begin putting new information into them. Only migrate and organize old notes on an as-needed basisβ€”when you need to refer to something specific from your old system. This makes the transition manageable and much less intimidating. For a deeper look at managing digital overwhelm, check out my book on Reclaiming Silence.

    Free download: 7-Day Mind Clarity Reset preview

    Free download: 7-Day Mind Clarity Reset

    A short daily reset you can actually stick with (no fluff).

    Helpful resources for your next step

    Affiliate disclosure: As an Amazon Associate, Mind Clarity Hub may earn from qualifying purchases at no extra cost to you. Use this link only if it genuinely helps your planning.

    If Second Brain Method: How to Build Your Digital Mind for Clarity & Productivity is a routine you want to keep using, a simple workbook, planner, or desk tool can make the steps easier to repeat.

    Compare related planners, workbooks, and organization tools on Amazon.